Eigenapes
July 23 2023
Making NFTs from the principal components of some monkeys
NOTE: I did this project well over a year ago, but left this post 80% finished. I’ve been on a journey to finish or abandon all of the in-progress projects I’ve got in my backlog. As such, I decided to just wrap this up as best I could and move on. Some of the information might be out-of-date or incorrect, so I apologize in advance.
NFTs became a big deal during the insanity of the pandemic. From the get-go I thought they were stupid but had some interesting technology underneath. For whatever reason, I felt the need to make NFTs to feel able to speak on how pointless they are. I understand this is just as stupid. There are so many better ways I could have spent my time.
As Bored Ape Yacht Club seemed to be the best known collection, I decided it would be my target. I figured extracting the principal components of these cartoon monkeys would at least be fun.
All source code for this project is available on GitHub.
Creating the Artwork
Collecting the Input Dataset
The first step in this process was to download every monkey picture—that’s right, I stole some NFTs. Etherscan is the tool to use here, as it let’s you track down the IPFS URI pointing to all of the NFTs’ images. IPFS is such cool technology that I’m a little sad it’s the “backbone” of many NFTs. Oh well. At its most simple, the idea behind IPFS is that files should be addressed by their content (e.g. via a hash) rather than a name (e.g. a URL).
From OpenSea, click the Contract Address link under Details to be taken to the contract.
From here, go to Contract > Read Contract and select baseURI to find the IPFS address.
I will warn you this doesn’t work for all NFT collections, but as most are just blind cash grabs following the first tutorial on Google, your success rate will likely be high.
Also try tokenURI.
The baseURI can the be looked up on ipfs.io to get a listing of all the images’ metadata.
Within each images’ JSON metadata will be an image keyword with the IPFS hash of the NFT.
It’s pretty straightforward to setup IPFS locally and pull down all of the monkey pics. collect_apes.py shows how to do it.
Eigenfaces
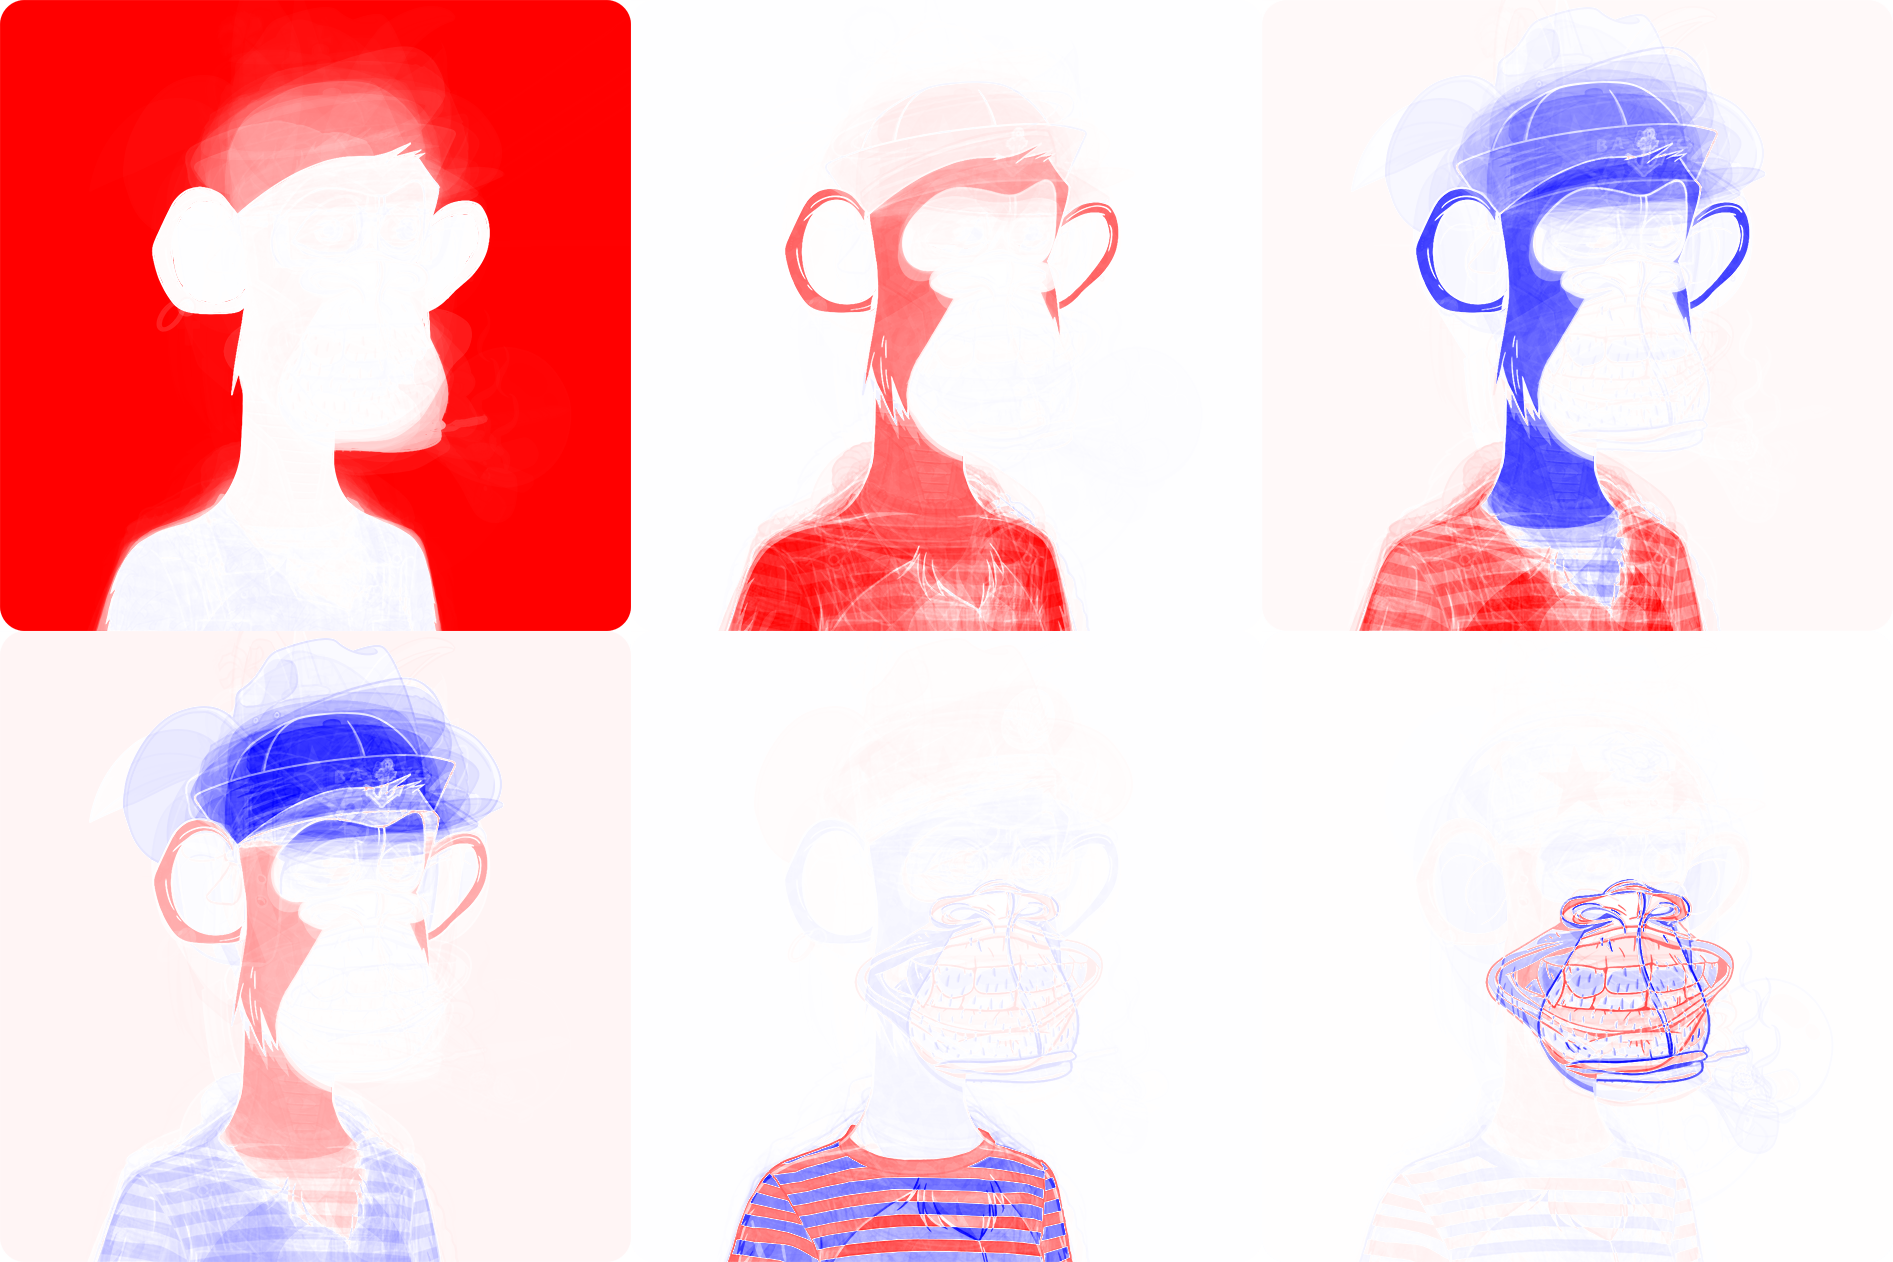
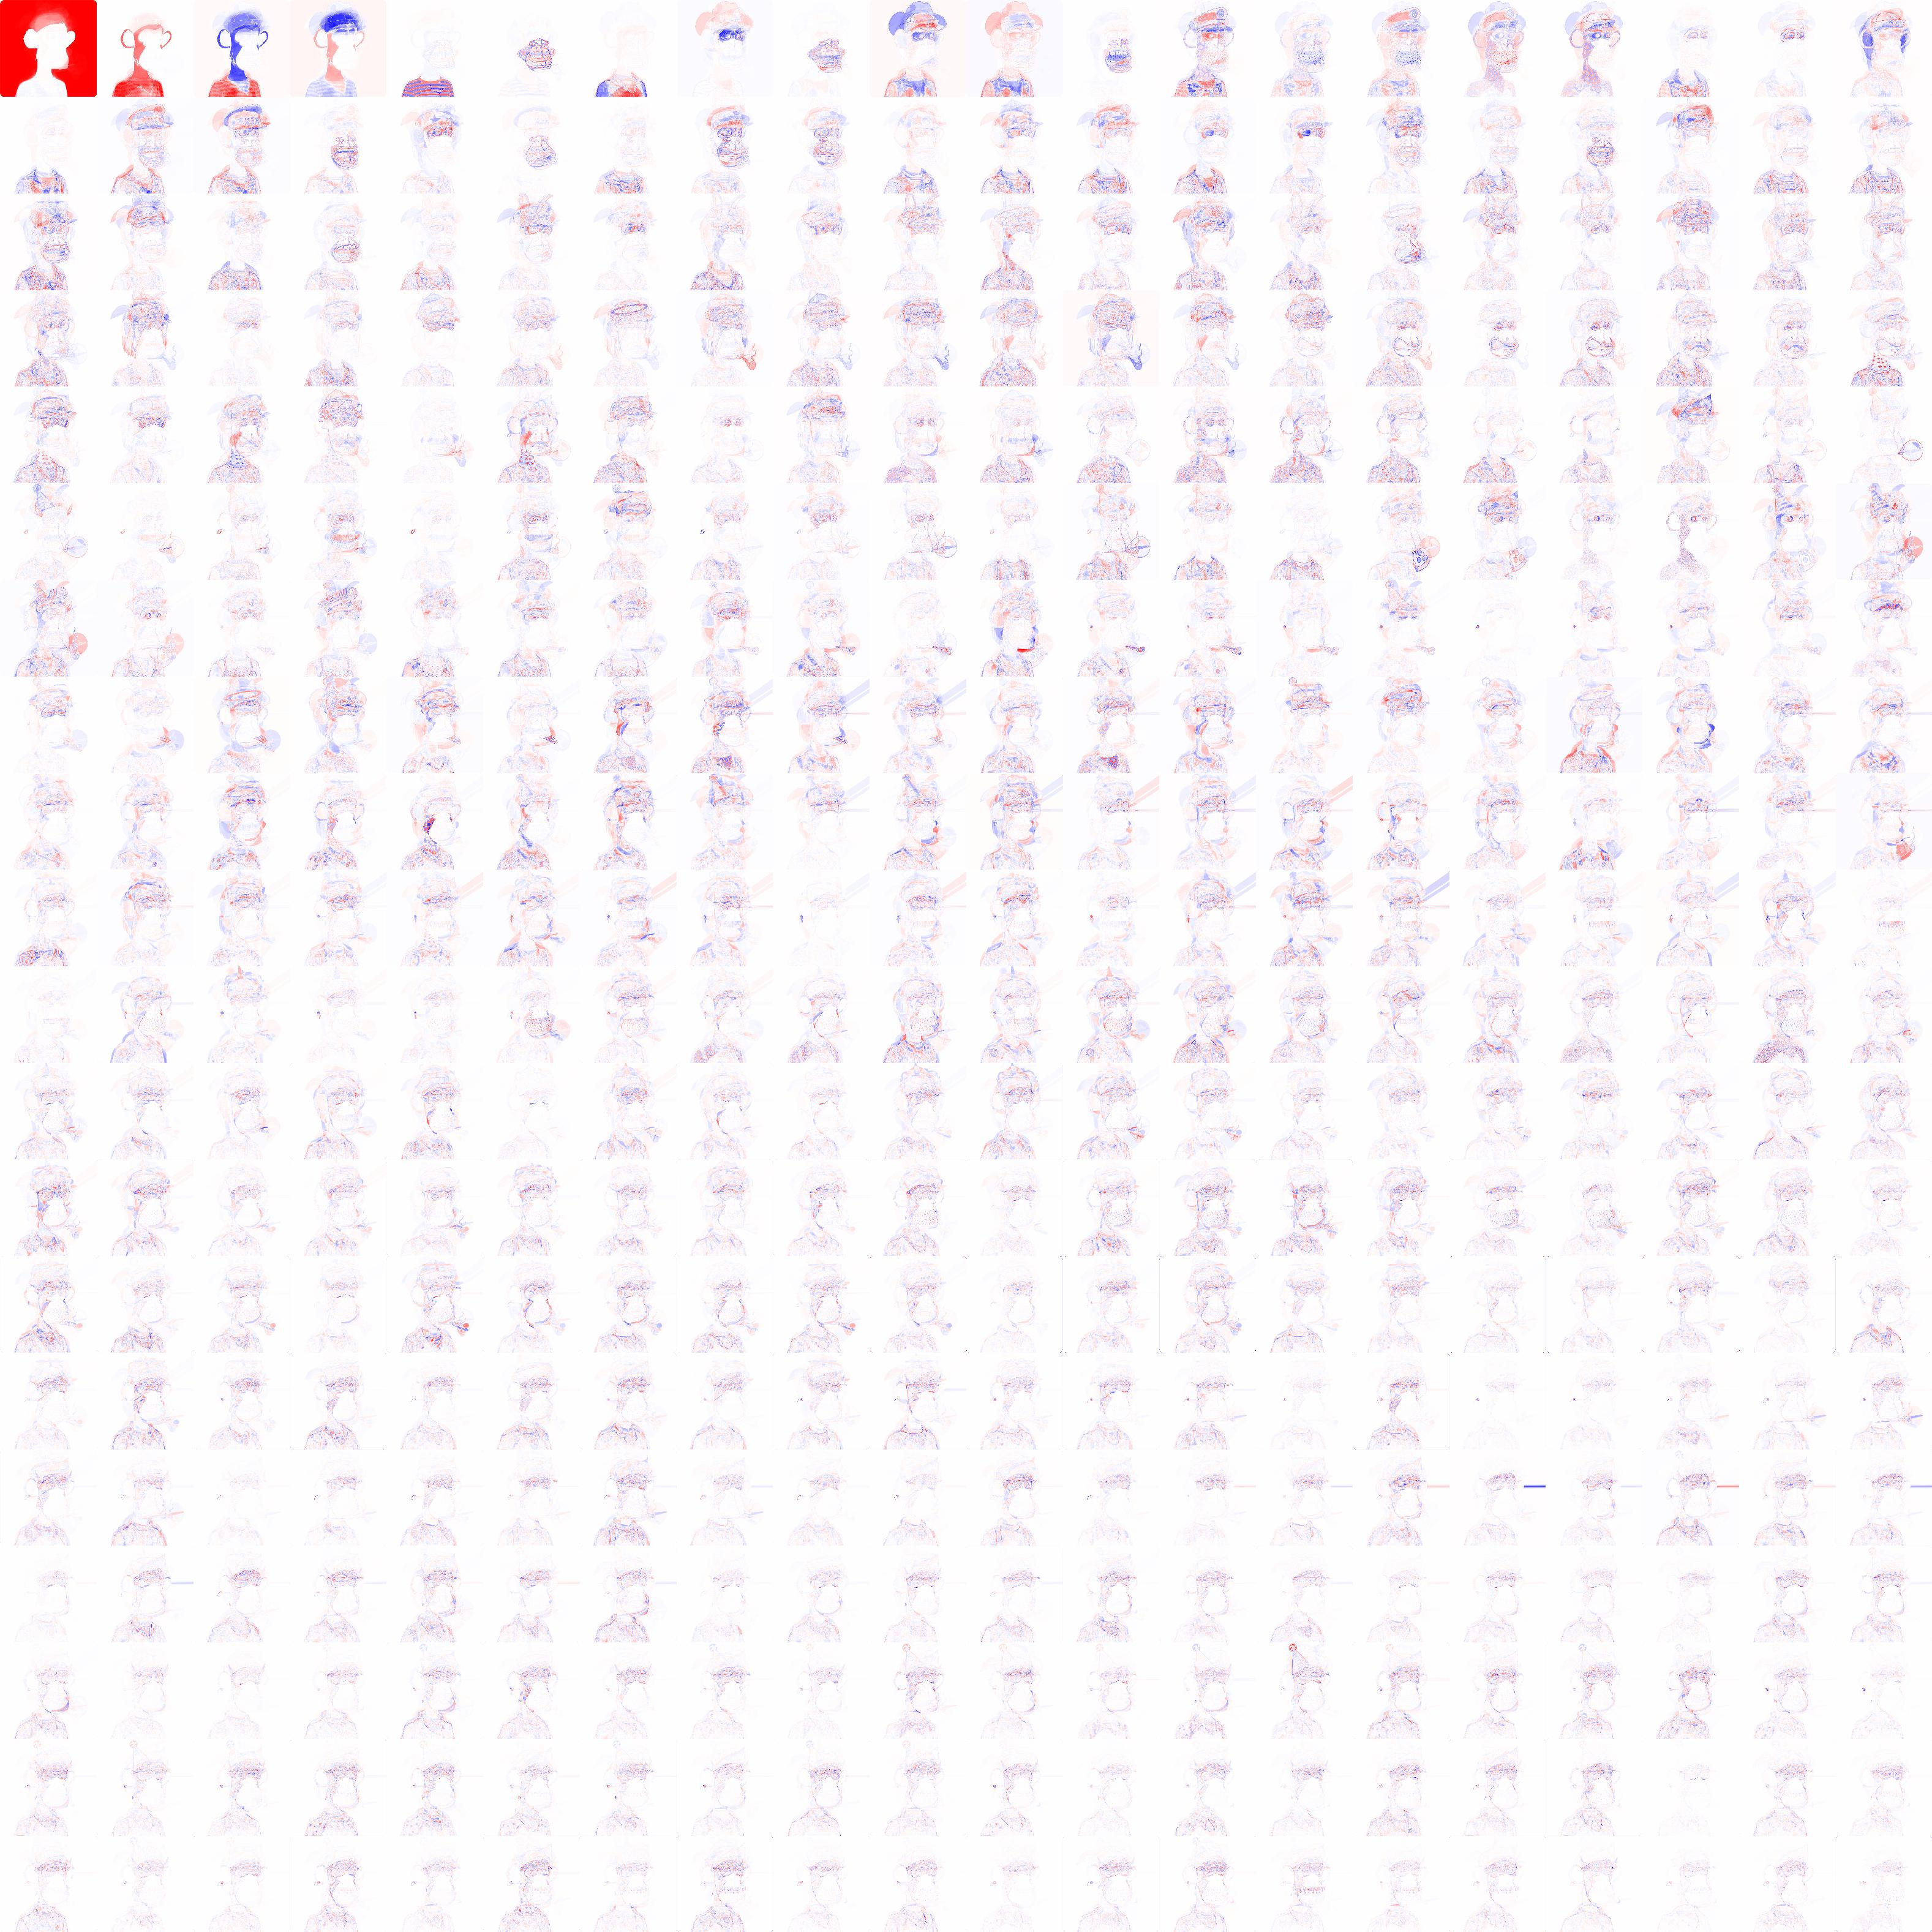
I first learned about Eigenfaces in college, and still find them to be a fascinating way to break down a set of like images. Finding the principle components of a sequence of images gives you a set of aspects shared across all images as well as their relative importances.
In practice, you flatten a series of images into column vectors, append them into a matrix \(\mathbf{X}\) and run a singular value decomposition on the result:
\[\mathbf{X} = \mathbf{U} \mathbf{\Sigma} \mathbf{V}^\top\]Where the columns of \(\mathbf{U}\) will be the eigenfaces, \(\mathbf{\Sigma}\) scale factors and \(\mathbf{V}^\top\) the weights of each eigenface in reconstructing the given inputs.
Should X Be Normalized?
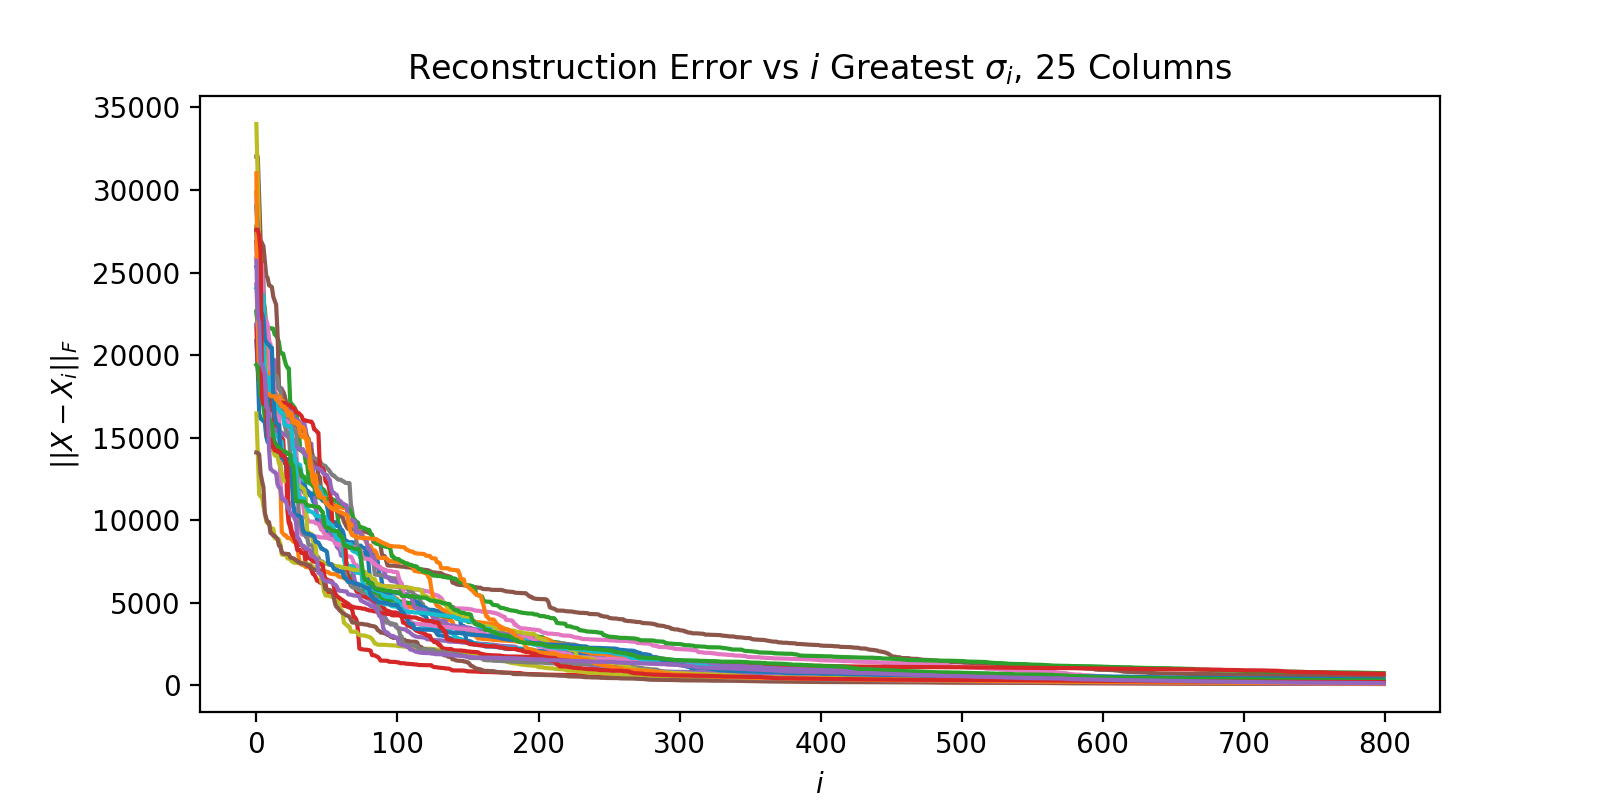
Out of curiosity, I tested whether normalizing the input (going from 0.0f - 255.0f to 0.0f - 1.0f) made any difference by comparing reconstruction error (via Frobenius norm). It seems like the answer is not really (visual results reaffirmed this):
| Unnormalized: | 0.00853059347718954 |
| Normalized: | 0.008303984068334103 |
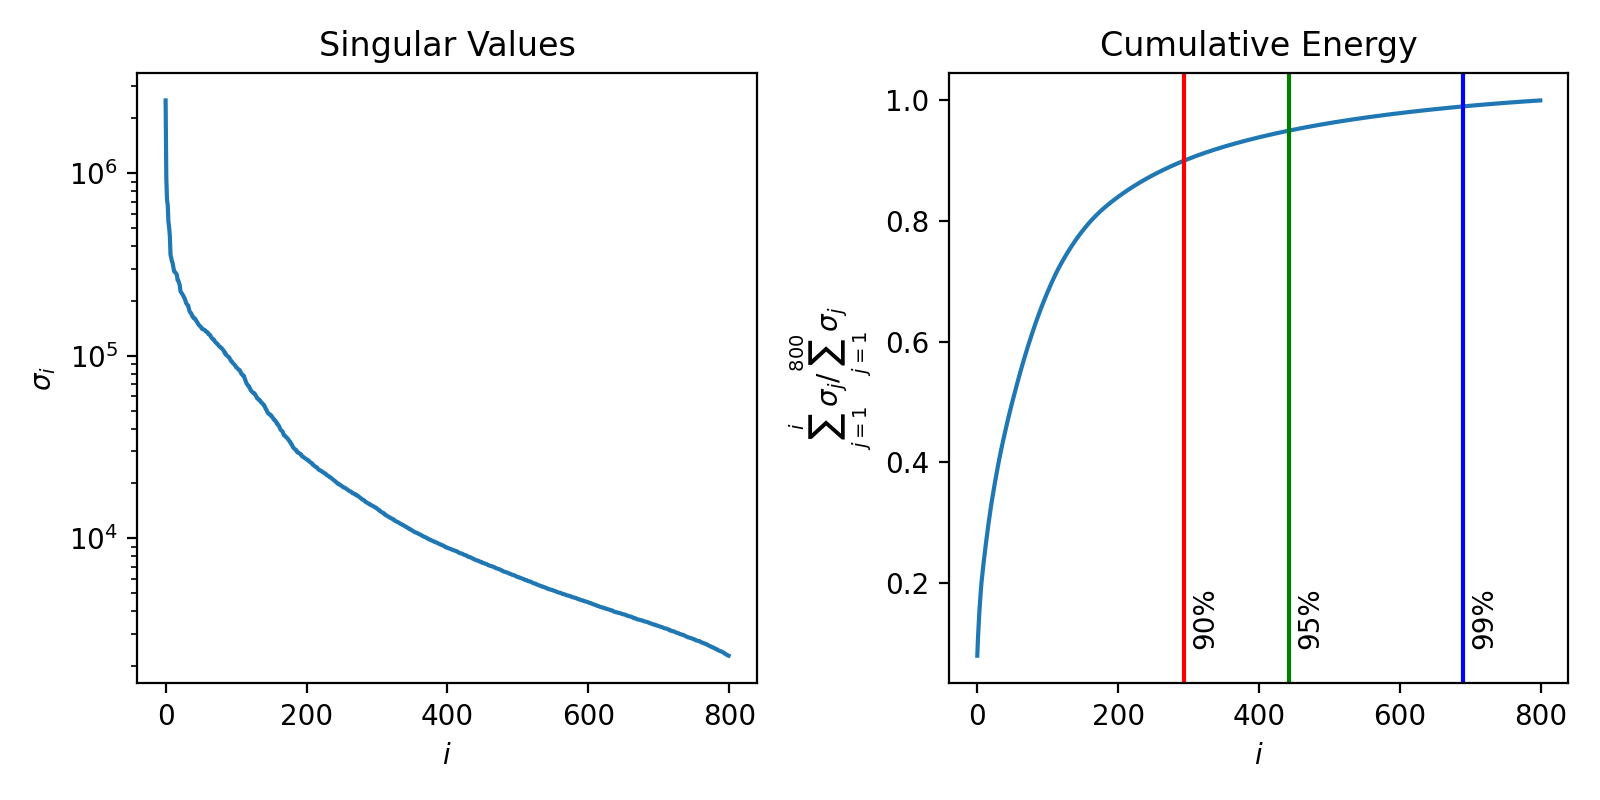
How Many Singular Values Do We Need?
The next question was: how many singular values do I use? This can be determined based on the magnitude of the singular values (\(\mathbf{\Sigma}\)), as this determines the “strength” with which eigenface is applied to a reconstruction. What’s really cool here is you only need a relatively small number of eigenfaces to reconstruct the original input with a high accuracy. From the input dataset of 10000 monkey pics, we are able to mostly describe them at around 400 eigenfaces / singular values. Intuitively, this makes sense because most (all?) apes are just permutations of a smaller set of features (e.g. smiling or not, type of shirt).
Making the NFTs
OpenZeppelin and OpenSea have great tutorials on how to set up NFTs.
More or less, there are three parts to an NFT:
- Images (e.g. PNG)
- Metadata (e.g. JSON)
- See OpenSea for more information on the metadata format.
- Contract (e.g. ERC-721)
Uploading to IPFS
By uploading our new eigenapes into IPFS, OpenSea and everyone else can find the images once they are linked to by our NFT. However, there is one drawback: you need IPFS to find your files. It’s much easier to use a pinning service like Pinata to host the images than doing it yourself (but you can if you like!). They’ve got a tutorial for uploading from the IPFS CLI.
See upload_eigenapes.py for an example of uploading images to IPFS.
Writing the Contract
I used an ERC-721 contract, because it seemed to be the simplest & easiest for a basic NFT. I’d recommend OpenZeppelin’s wizard to make sure your contract is written correctly. I skipped making my contract implement Enumerable, because it cost significantly more gas (price of running a contract) and was not necessary for OpenSea support.
To write and use an Ethereum contract, I used Hardhat. My Hardhat configuration can be built with:
npx hardhat compile
The actual Ethereum contract was written in Solidity.
Testing Locally
Apparently you can unit test Ethereum contracts. This seems neat, but as I’m trying to get rich quick it seems at odds with my goal.
I just used the following command from the eth directory and checked that things worked manually:
npx hardhat run scripts/deploy.js
See scripts/deploy.js.
Testing on a Testnet
To test out an NFT, the steps are as follows:
- Get testnet ether
- I used the Rinkeby testnet, which has since been deprecated.
- Connect to the testnet (e.g. set up a node)
- Alchemy had an easy free service for setting up a node
- Deploy the script and verify the result
npx hardhat run --network rinkeby scripts/deploy.js npx hardhat verify --network rinkeby 0xc23c194A1EAB0c1c8BB8a67f08F3Cb0baC682359 - Find the NFT collection with OpenSea testnets
I tested with a collection I called CryptoColors, comprised of a set of .png’s of a single color each.
I would point to the contract, but it’s been so long its now removed from the Rinkeby testnet.
Publishing the NFT
The process is more or less the same as on the testnet, but this time targeting the real Ethereum network (and costing real ETH).
The first 10 Eigenapes now live in an OpenSea Collection.
Using a Hardware Wallet
As I stored my Ethereum on a Trezor, I had to find a way to integrate it. Frame ended up being the easiest way to do so.
I ended up using MetaMask to actually store the NFTs in my wallet. Trezor has a blog post with more details.
Conclusion
In conclusion, this was actually a really fun project to do—especially stealing the NFTs and breaking them down. I still disagree with NFTs as they exist today, but maybe someone will actually find a reasonable use for them down the road.