Headboard
August 8 2023
How I built a headboard
I had a bunch of 2x6’s laying around outside, and decided to make them into a shiny new headboard. We had been using them to keep leaves from coming under our patio railing, but once it started raining (which doesn’t actually happen in the bay) they caused water to pool and we had to remove them.
Cleanup and Gluing
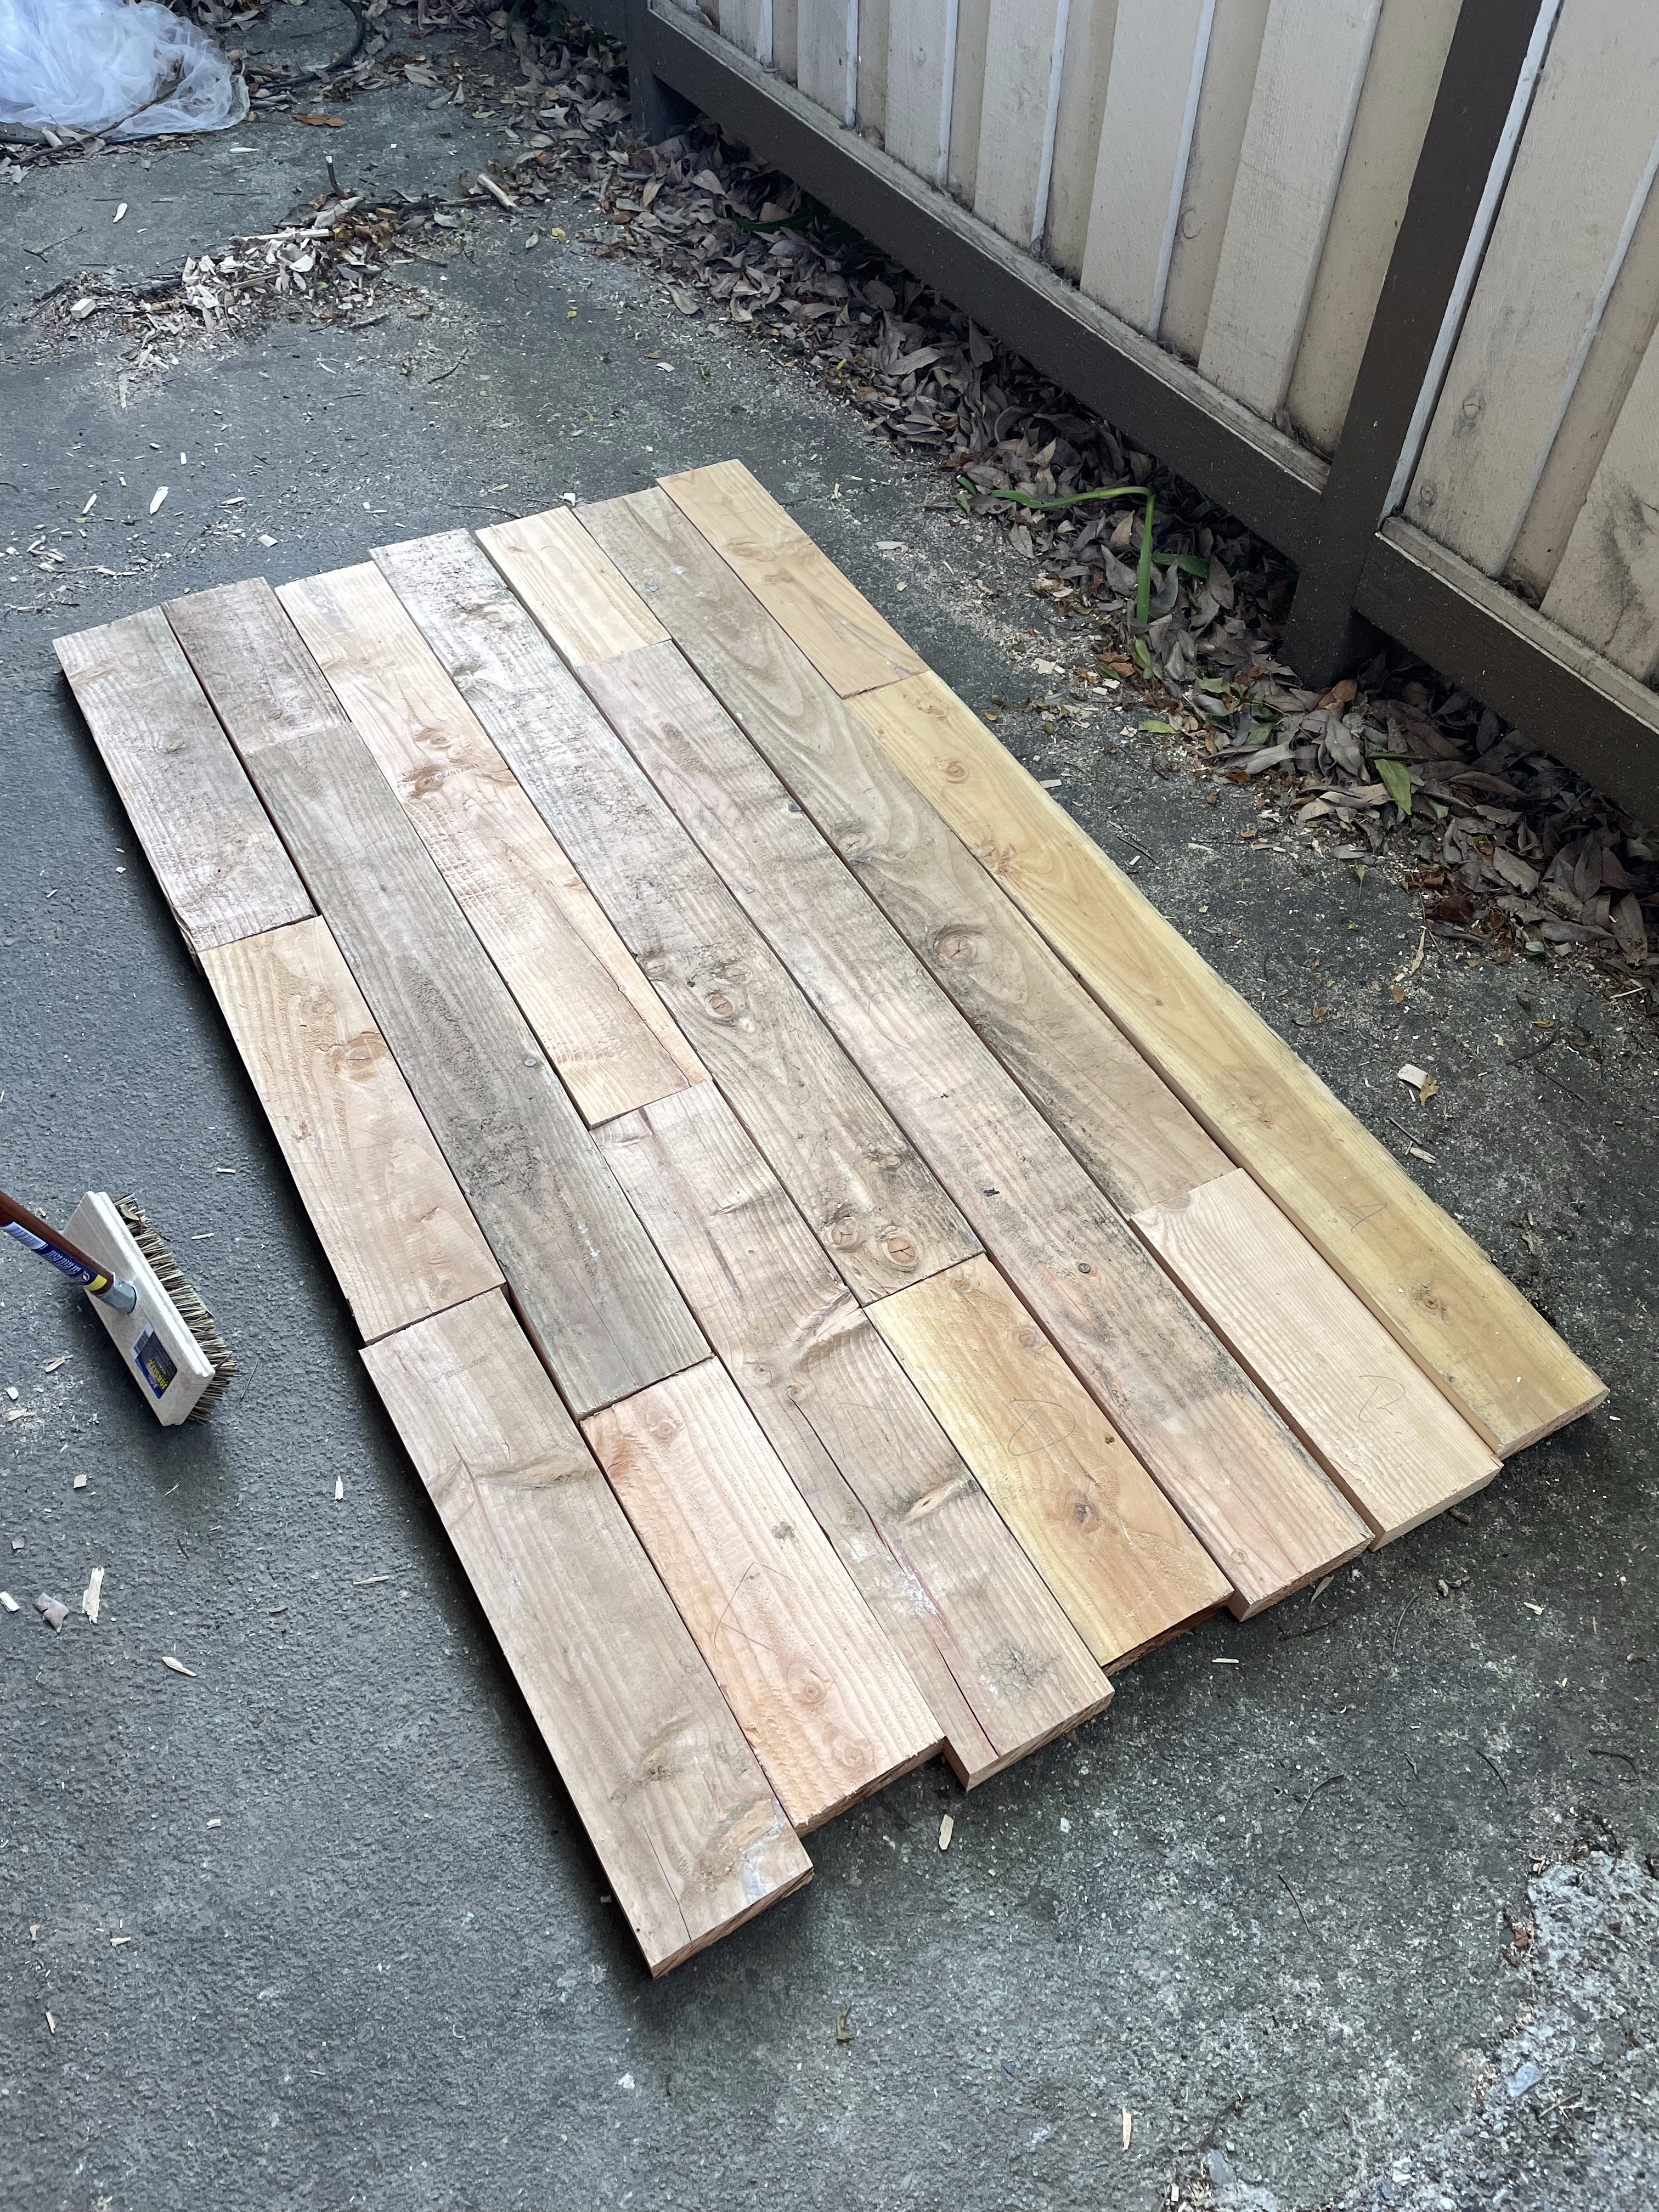
As the boards had been sitting out for around a year, they did need some cleanup. I planed the edges to get a clean, square face for edge gluing. The faces were left for the later smoothing pass.
I used a radial arm saw to cut the boards down to length. Sizes were chosen to make a nice pattern.
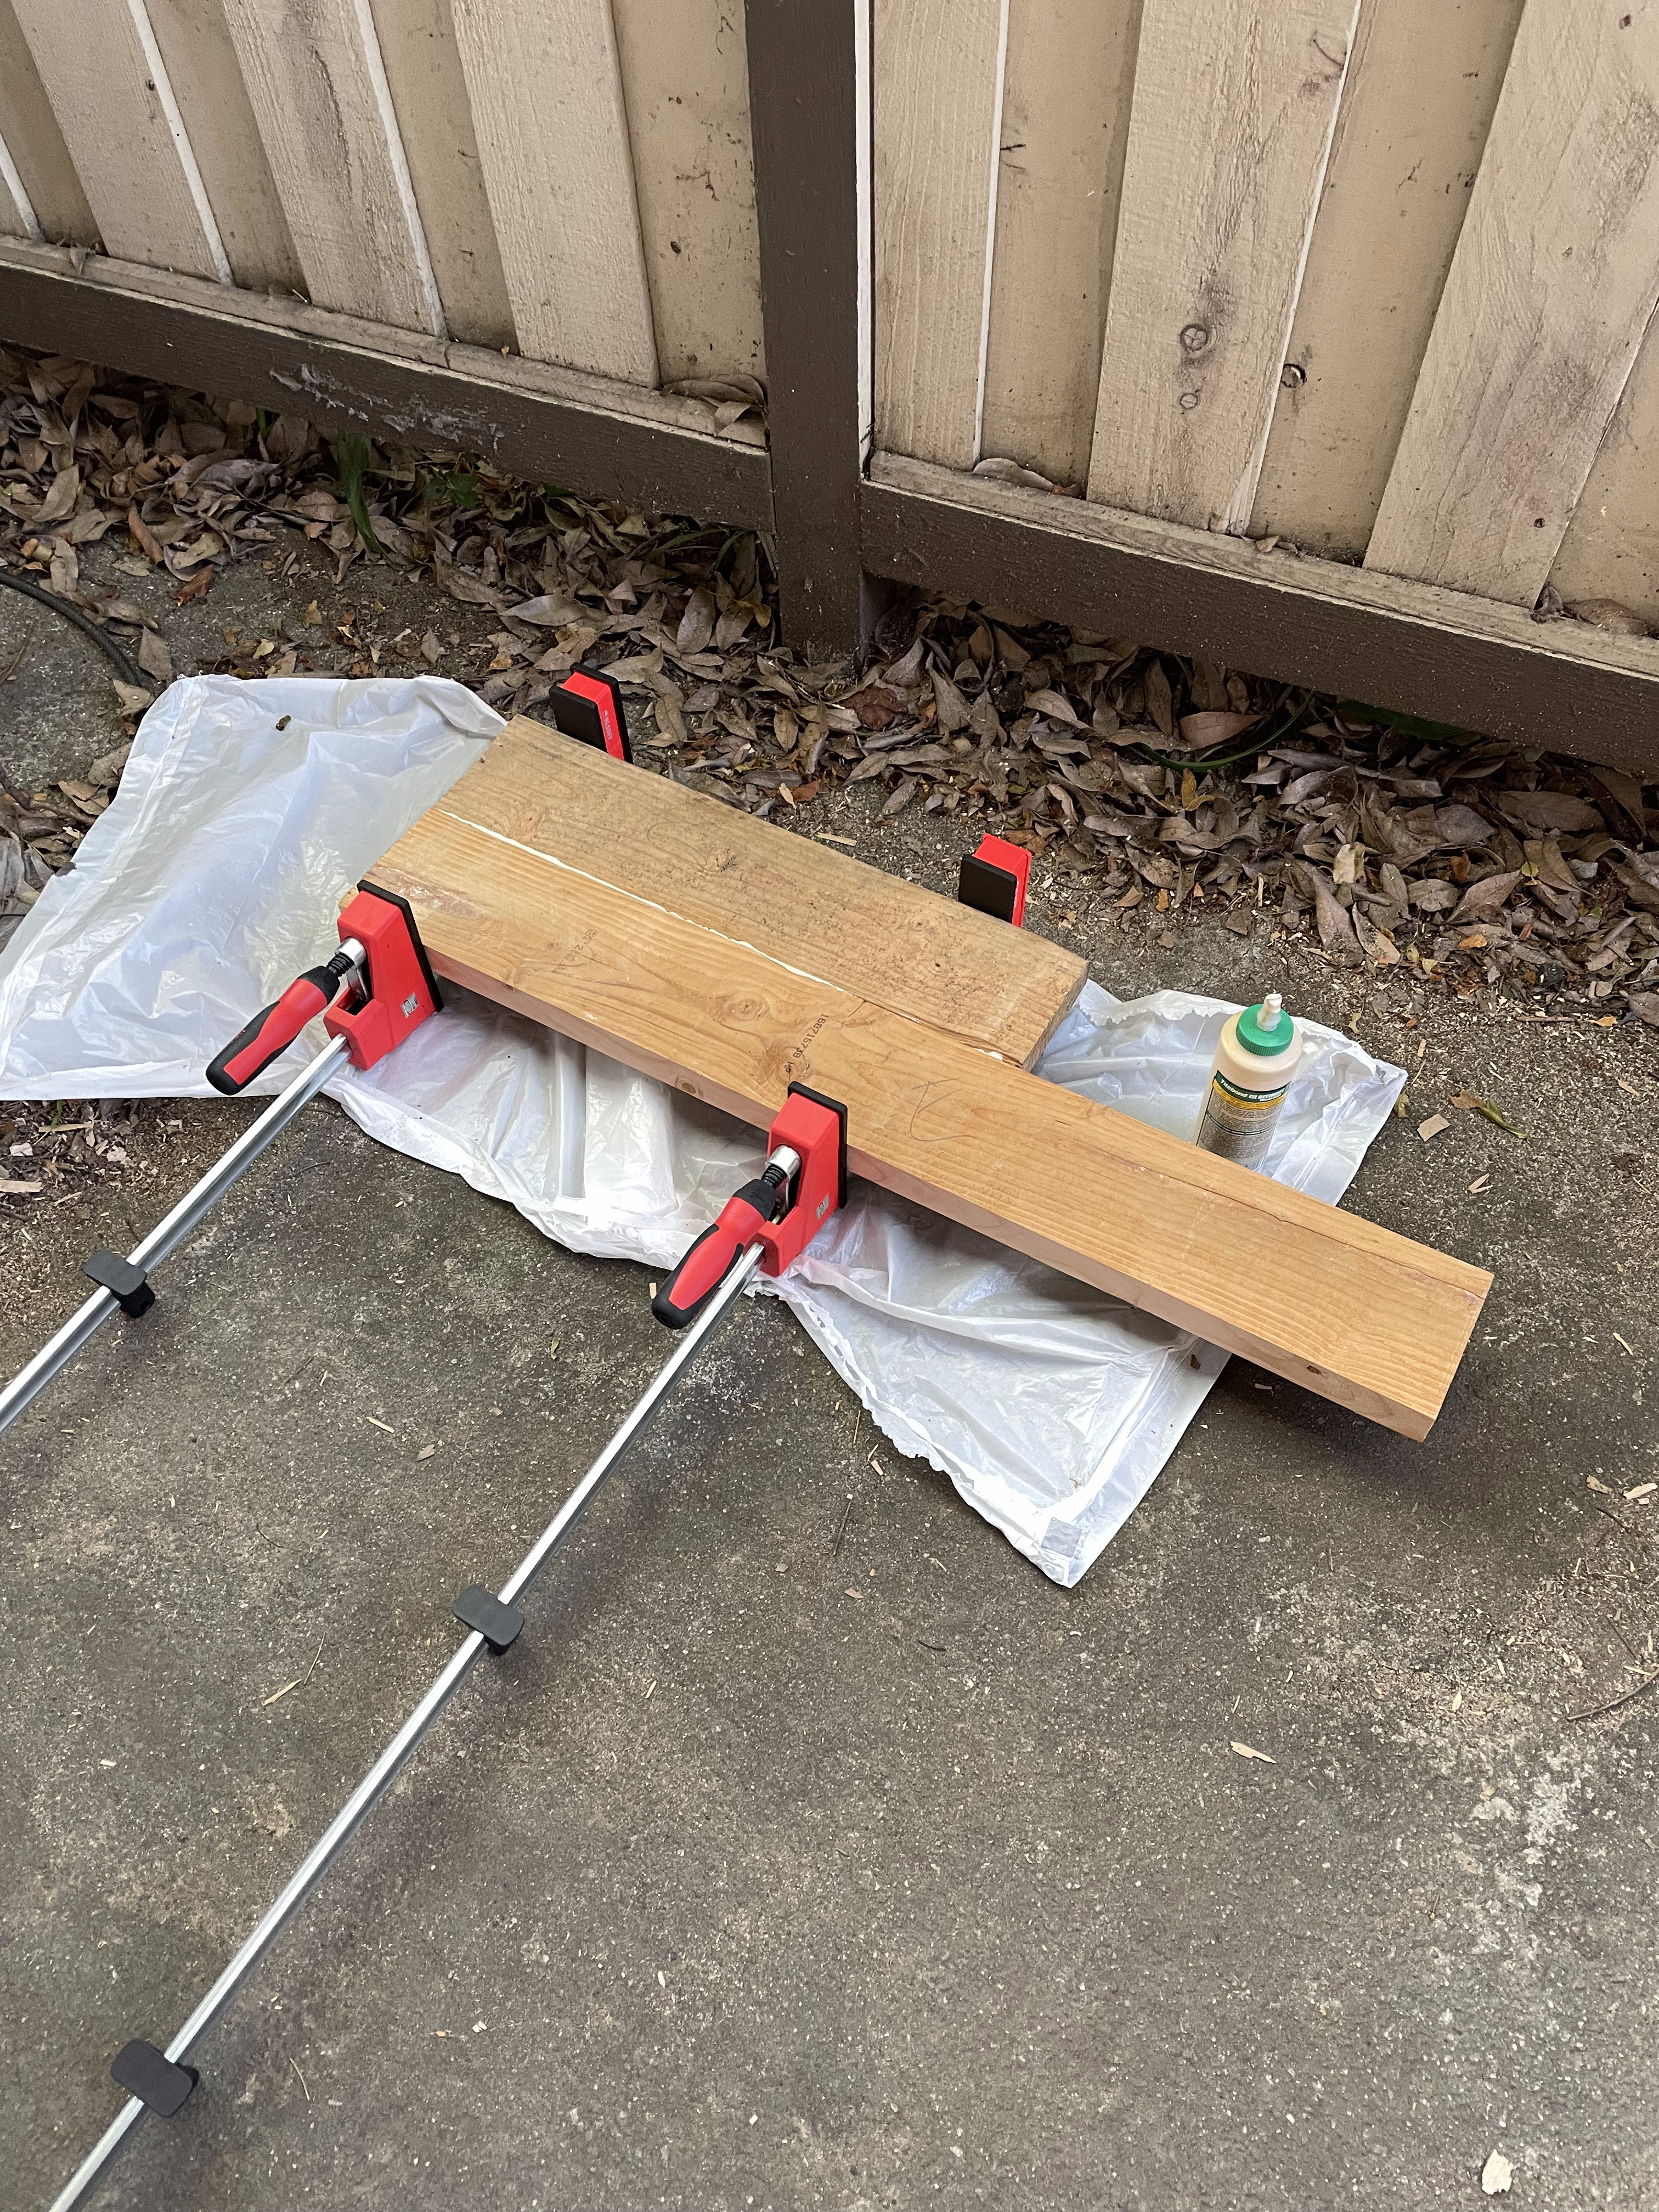
I made a couple of mistakes during glue-up. I should have covered the clamps to prevent spills from drying on. Likewise, I should have scraped the excess glue when semi-soft to save on later cleanup.
This process took about a week as I could only glue a couple of boards per day.
Smoothing

I cut down the sides of the headboard to get it roughly square with a circular saw and a straight edge.
Next, I planed down parts of the faces of the headboard. As the boards were incredibly uneven, I didn’t think sanders would be enough and opted to cut down large differences via a planer.
Once done, I went to town with a belt sander and 36 grit sandpaper. I chewed through many more belts than necessary because I applied far more pressure than required, but I did get the job done.
I finished by passing over the entire headboard with 80, 120, 180, 220 and then 400 grit sandpaper on a random orbit sander. I opted to round the corners over by hand at this point. I’m very happy with how smooth this got the surface of the headboard.
Finishing
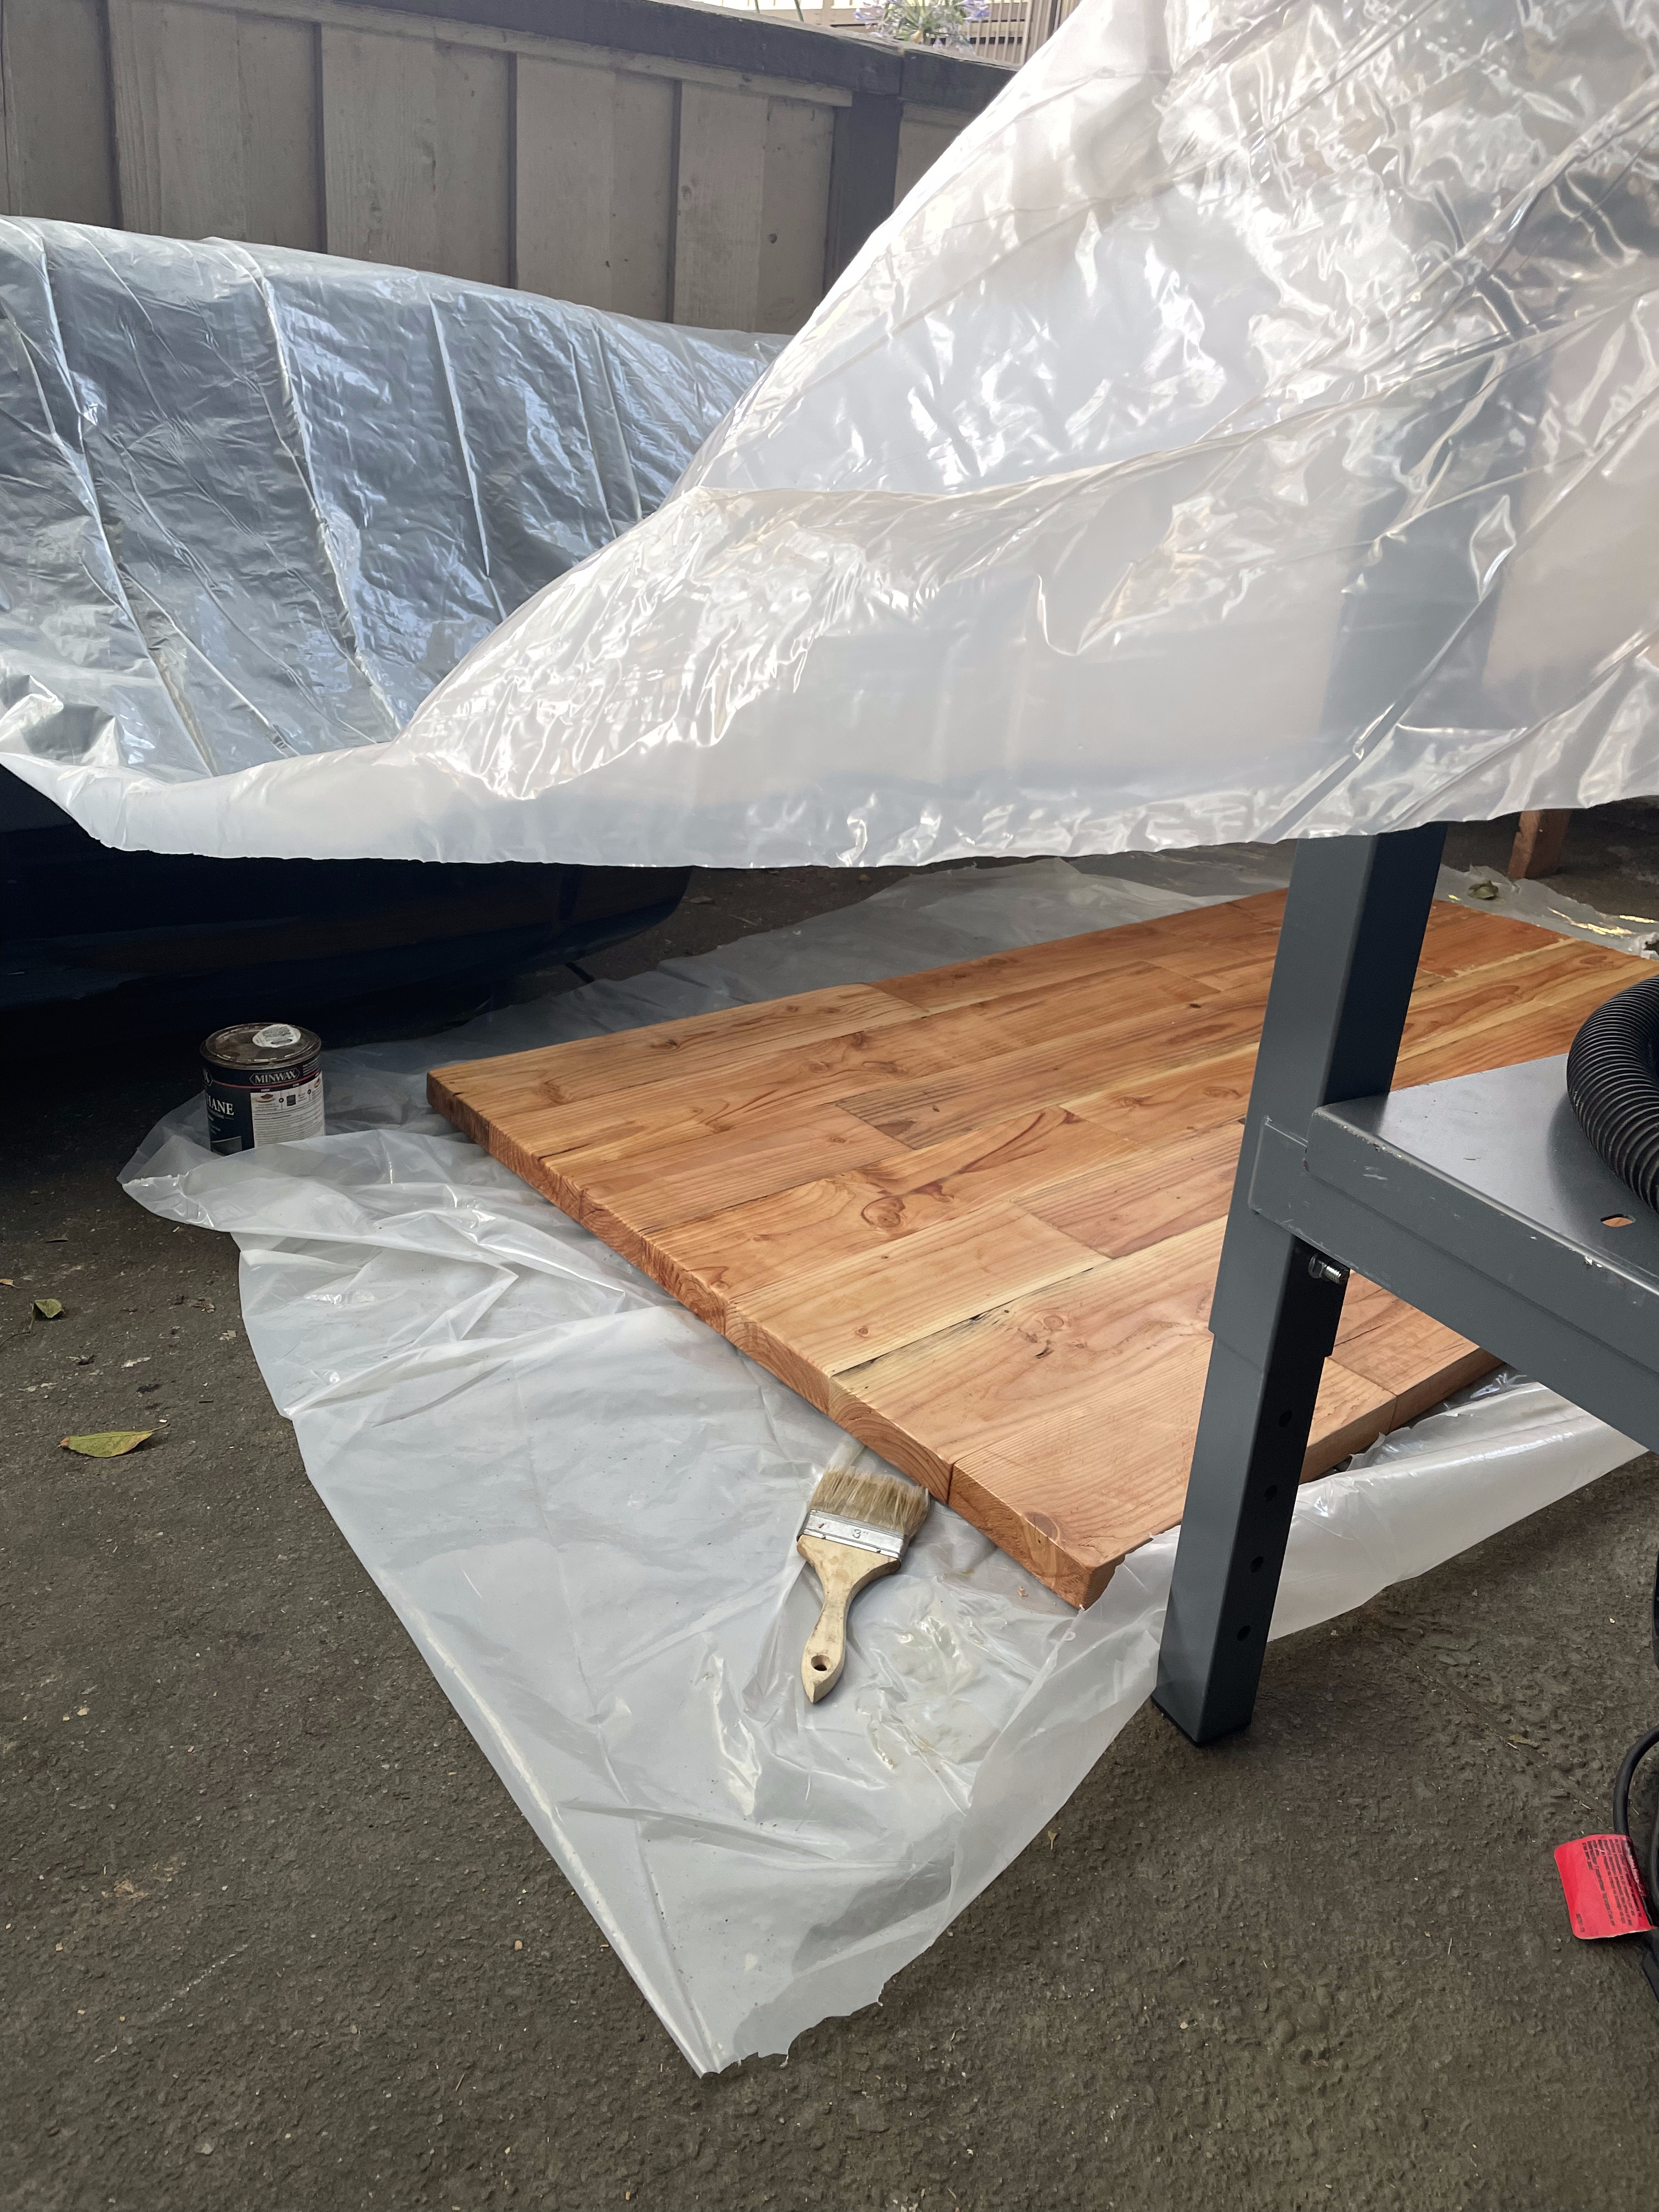
I chose polyurethane for this project to help seal in anything within the wood. I had noticed a fair bit of sap on the surface during the glue-up and sanding phases and didn’t want this to seep out. I also really like the shiny, but natural, appearance of polyurethane.
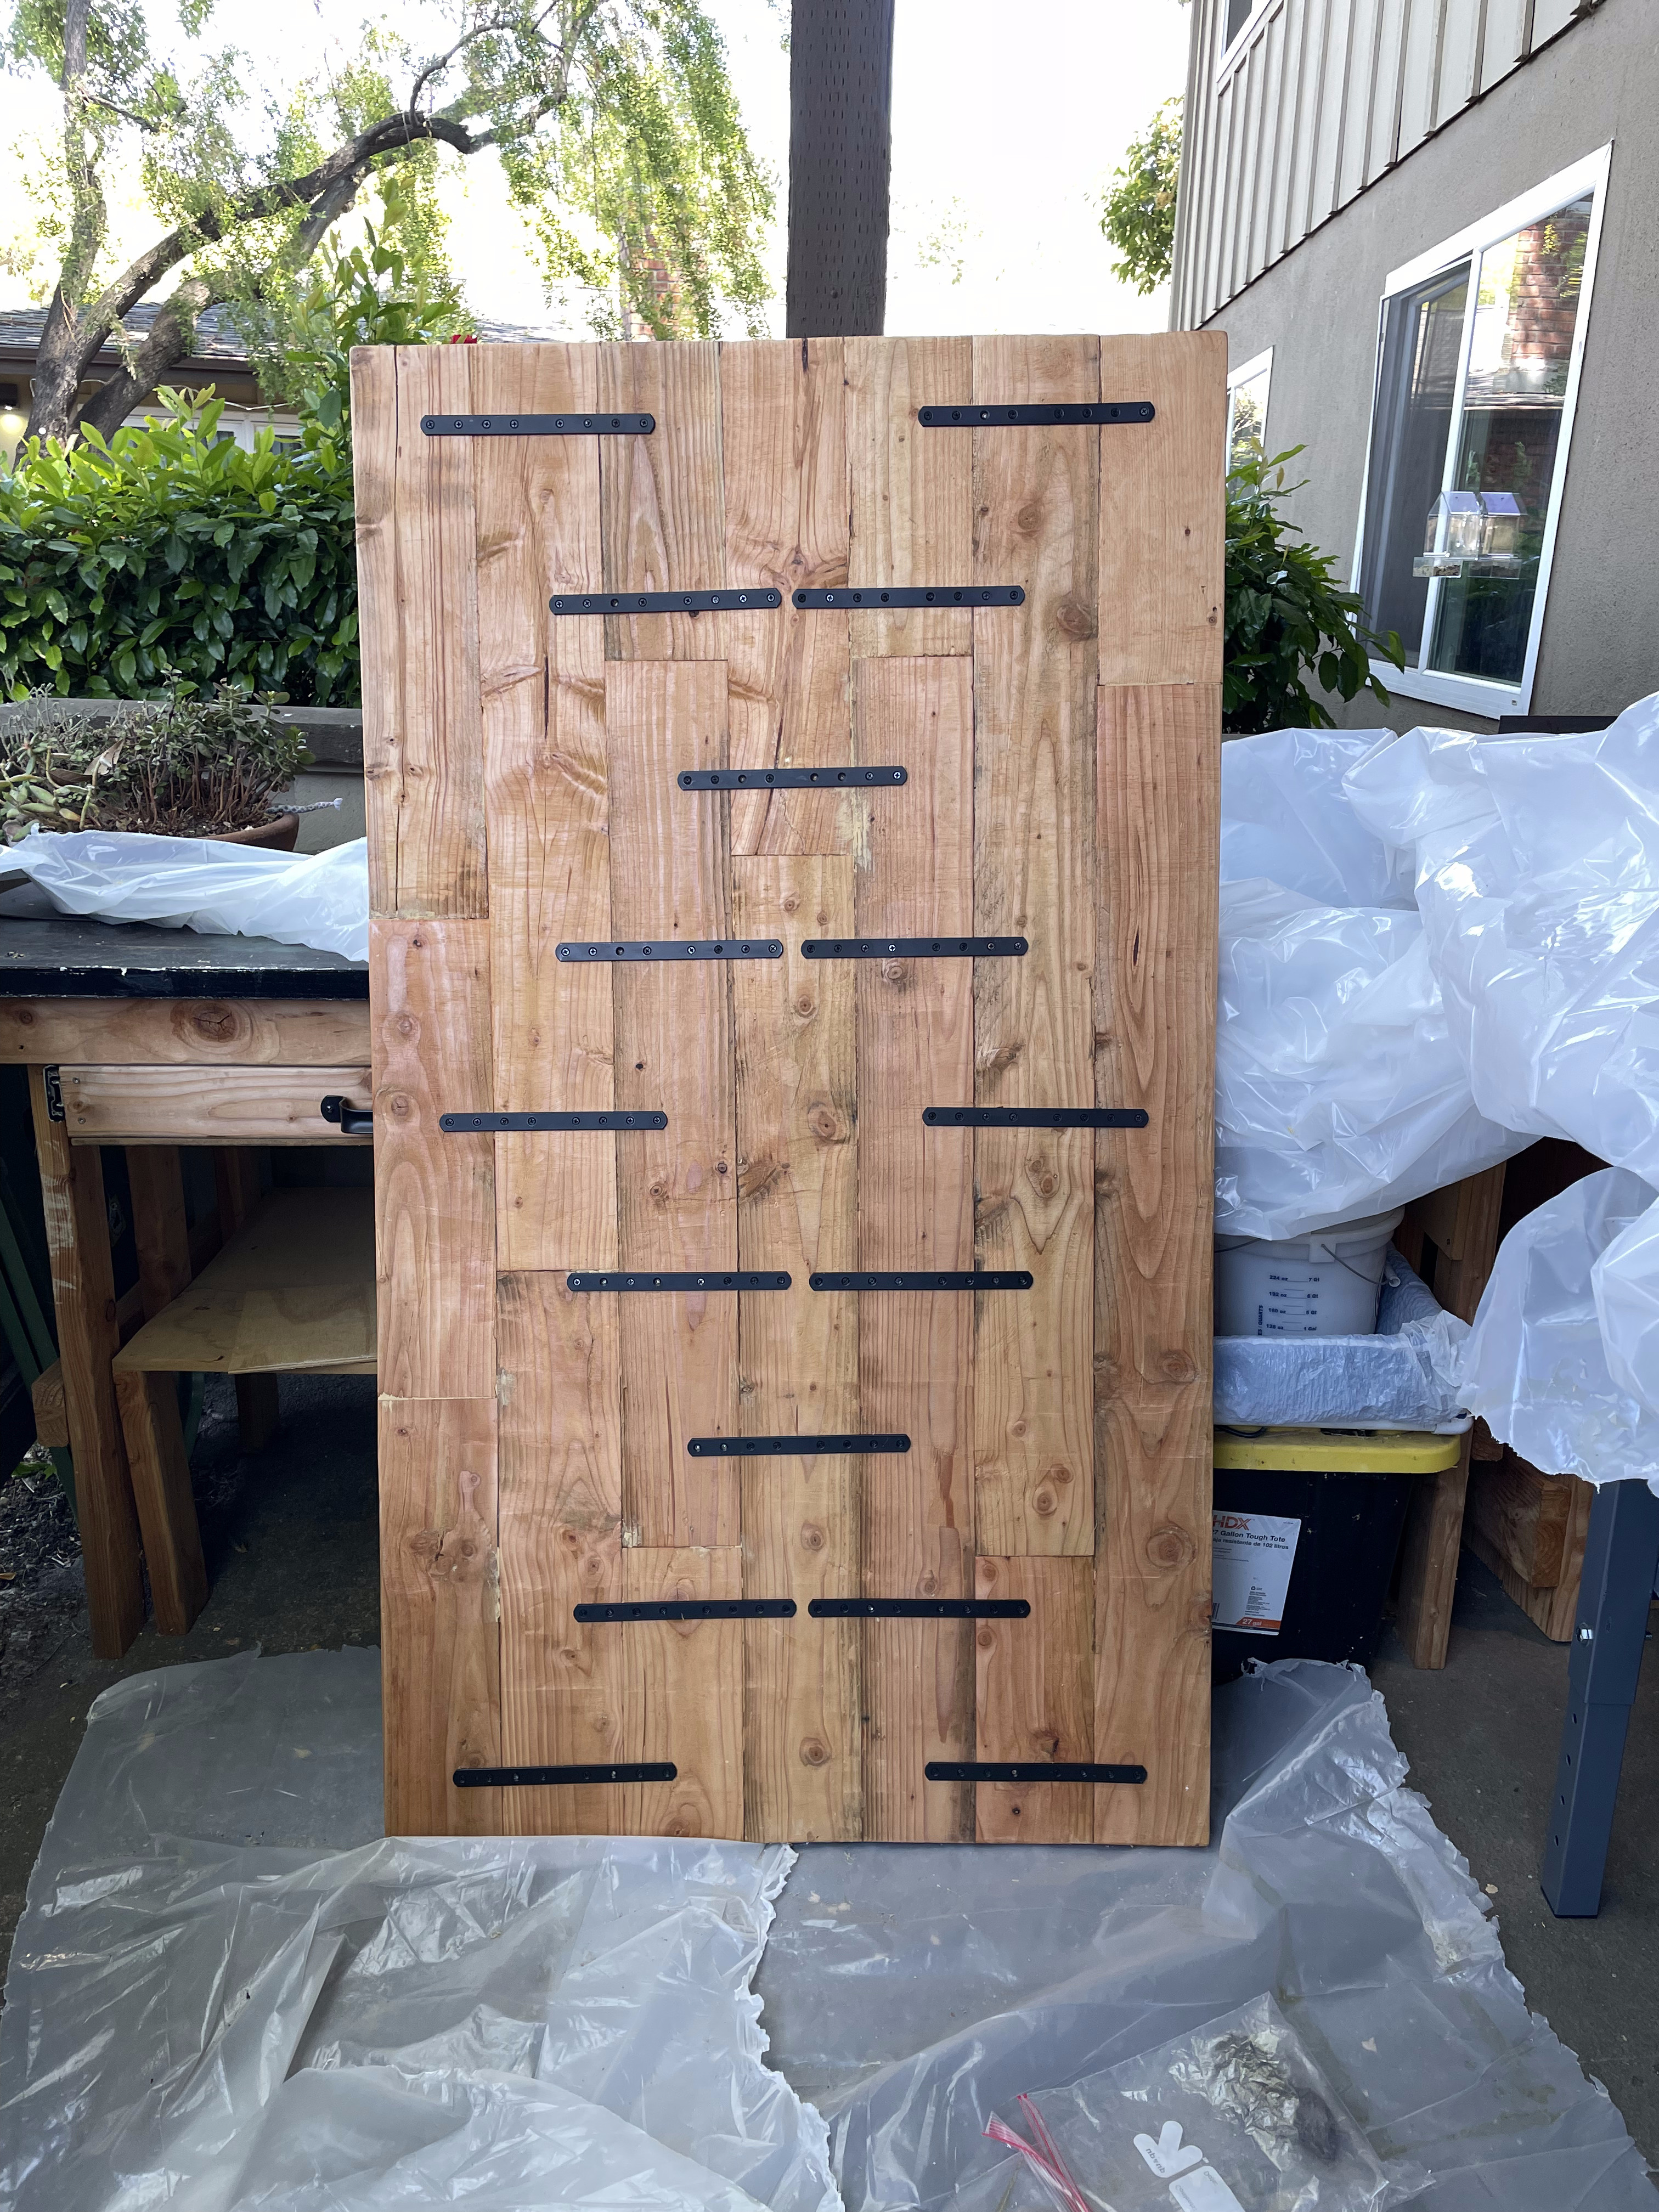
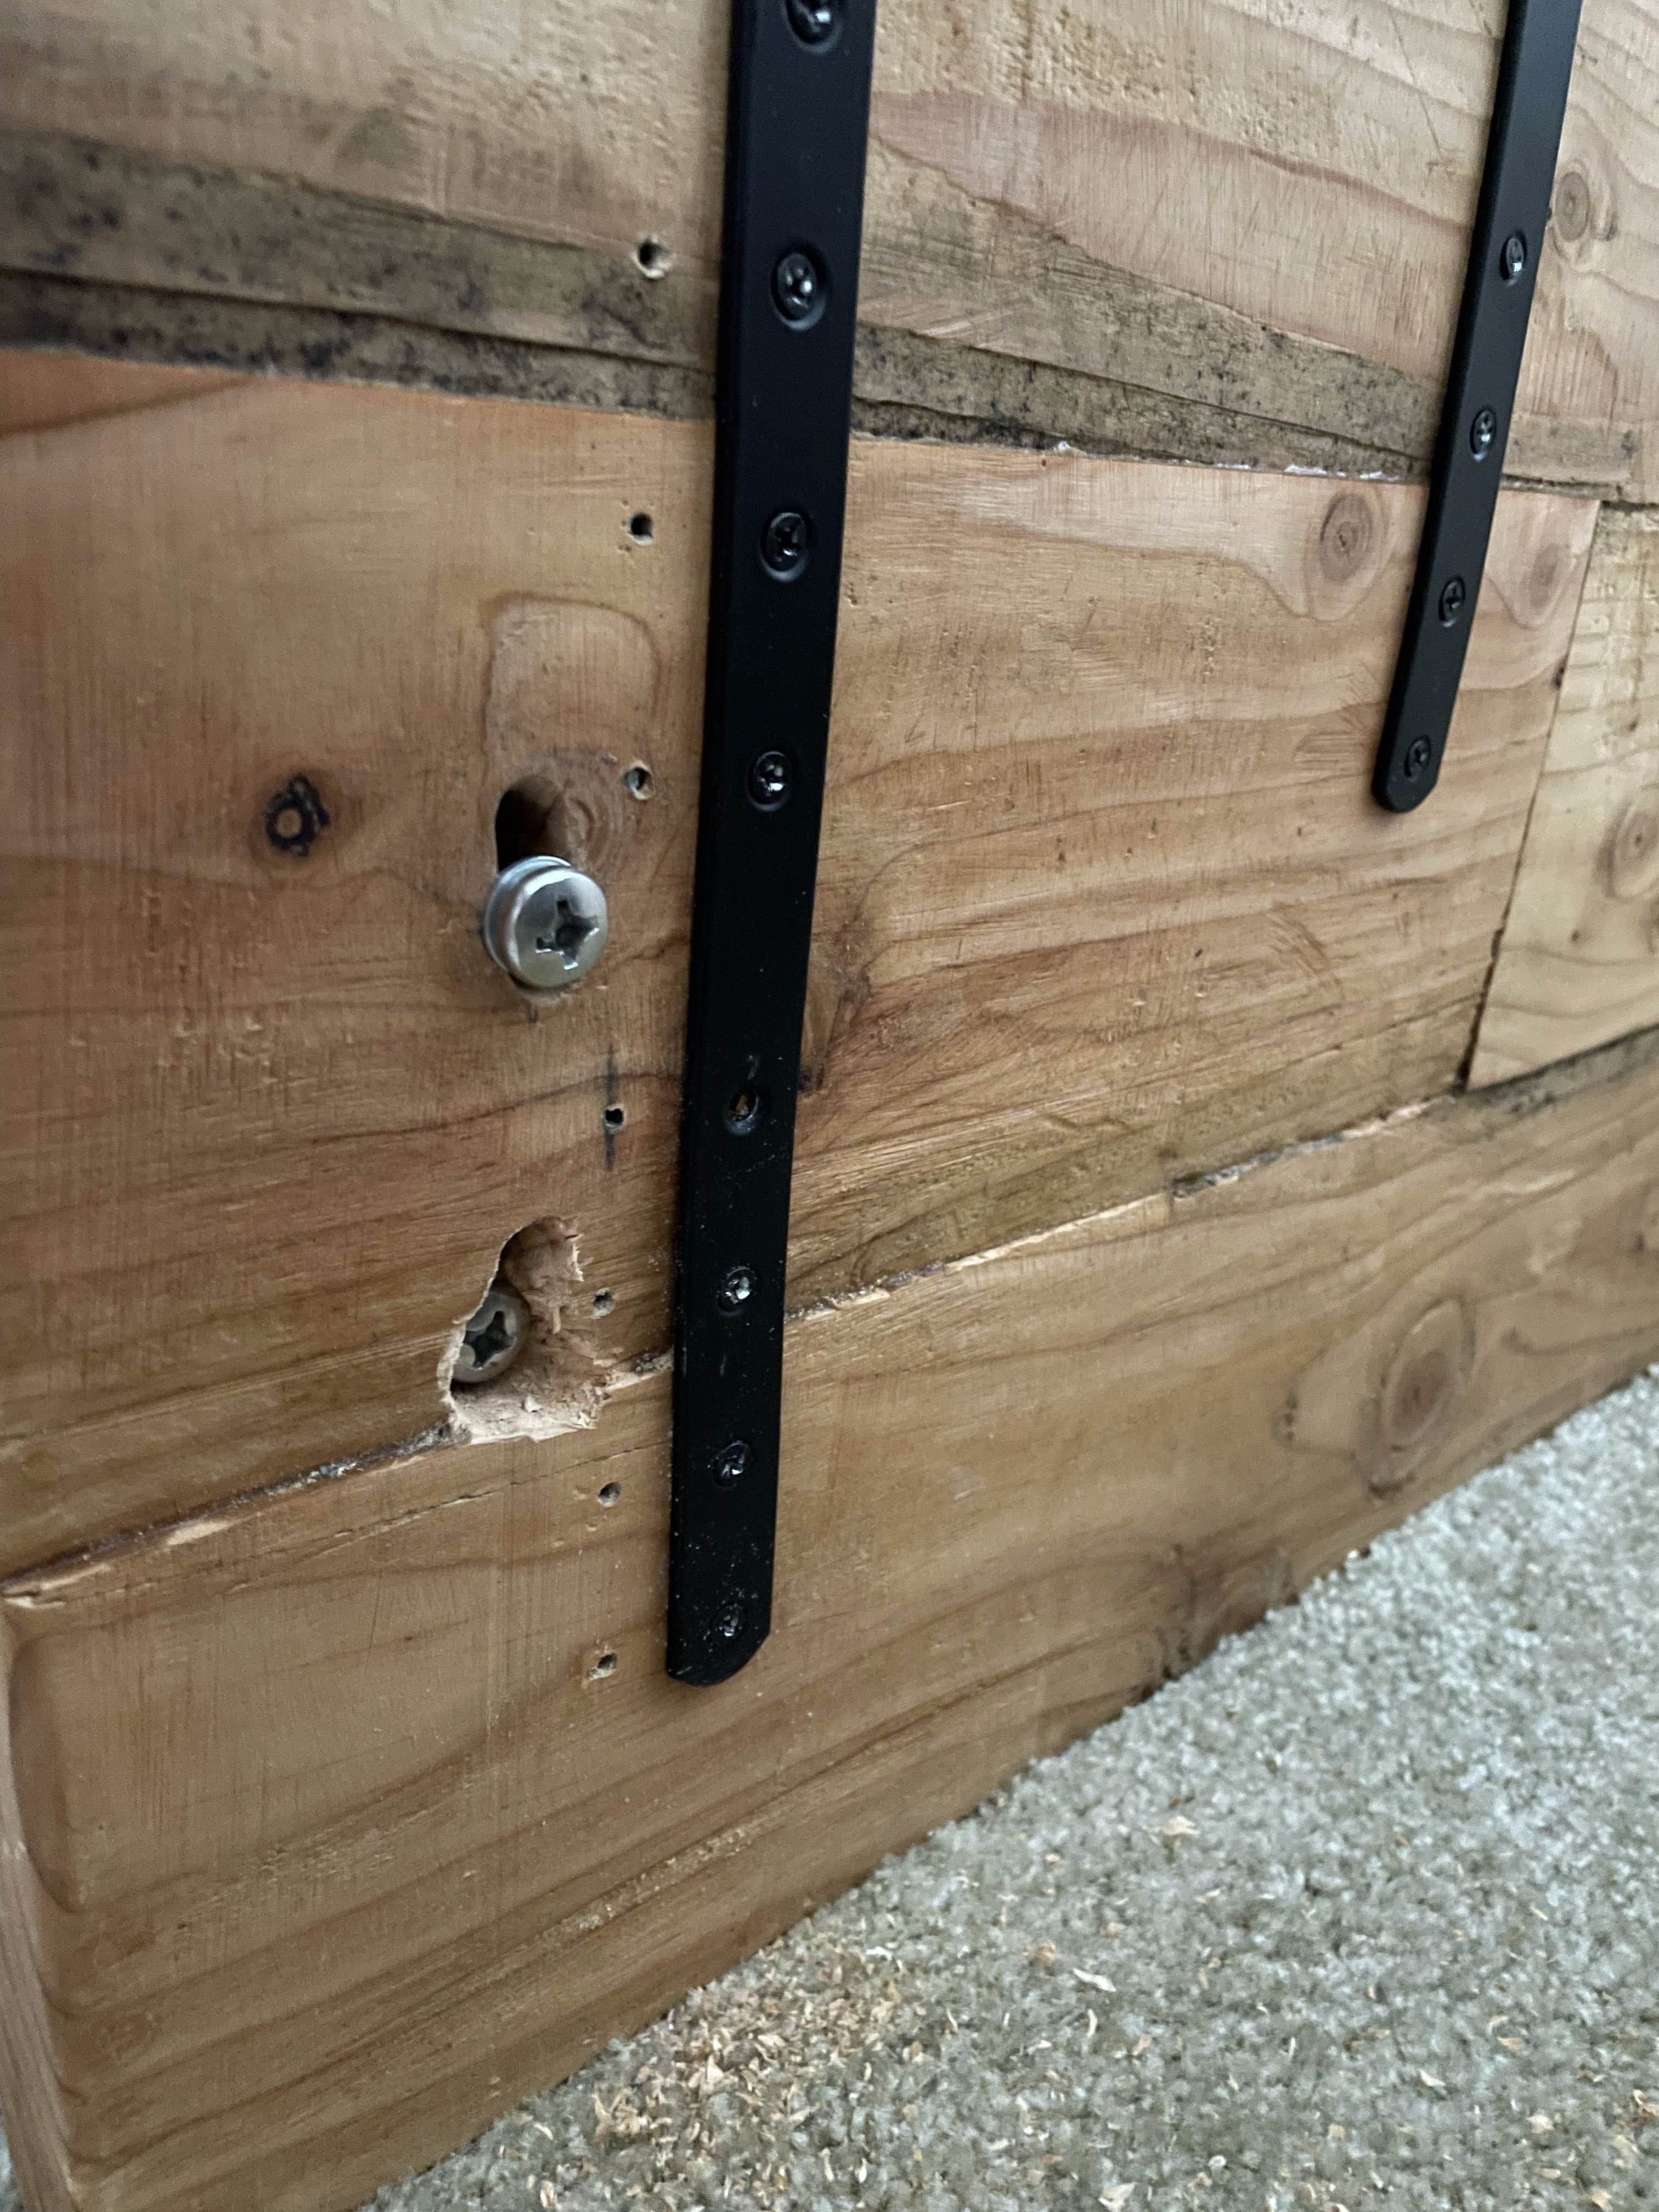
The wood boards required way more force than I anticipated during glue-up (due to lack of control over board widths). Being that they were green (fresh) when purchased, I expect they will contract over time. I added a bunch of metal braces to the back of the headboard to mitigate this.
Mounting
By this point I was more wanting the headboard to be done than wanting to do a good job. This is the worst way to work with wood.
I roughly lined up the holes in my bedframe with the headboard and marked with a pencil where I would need to drill. This worked pretty well for the first couple, but of course I failed to get all four to line up at the same time.
In the end, I just had to keep drilling out the holes until I could get the bolts in. If I ever have to do this again I’m just going to measure everything out properly from the get-go.
Result
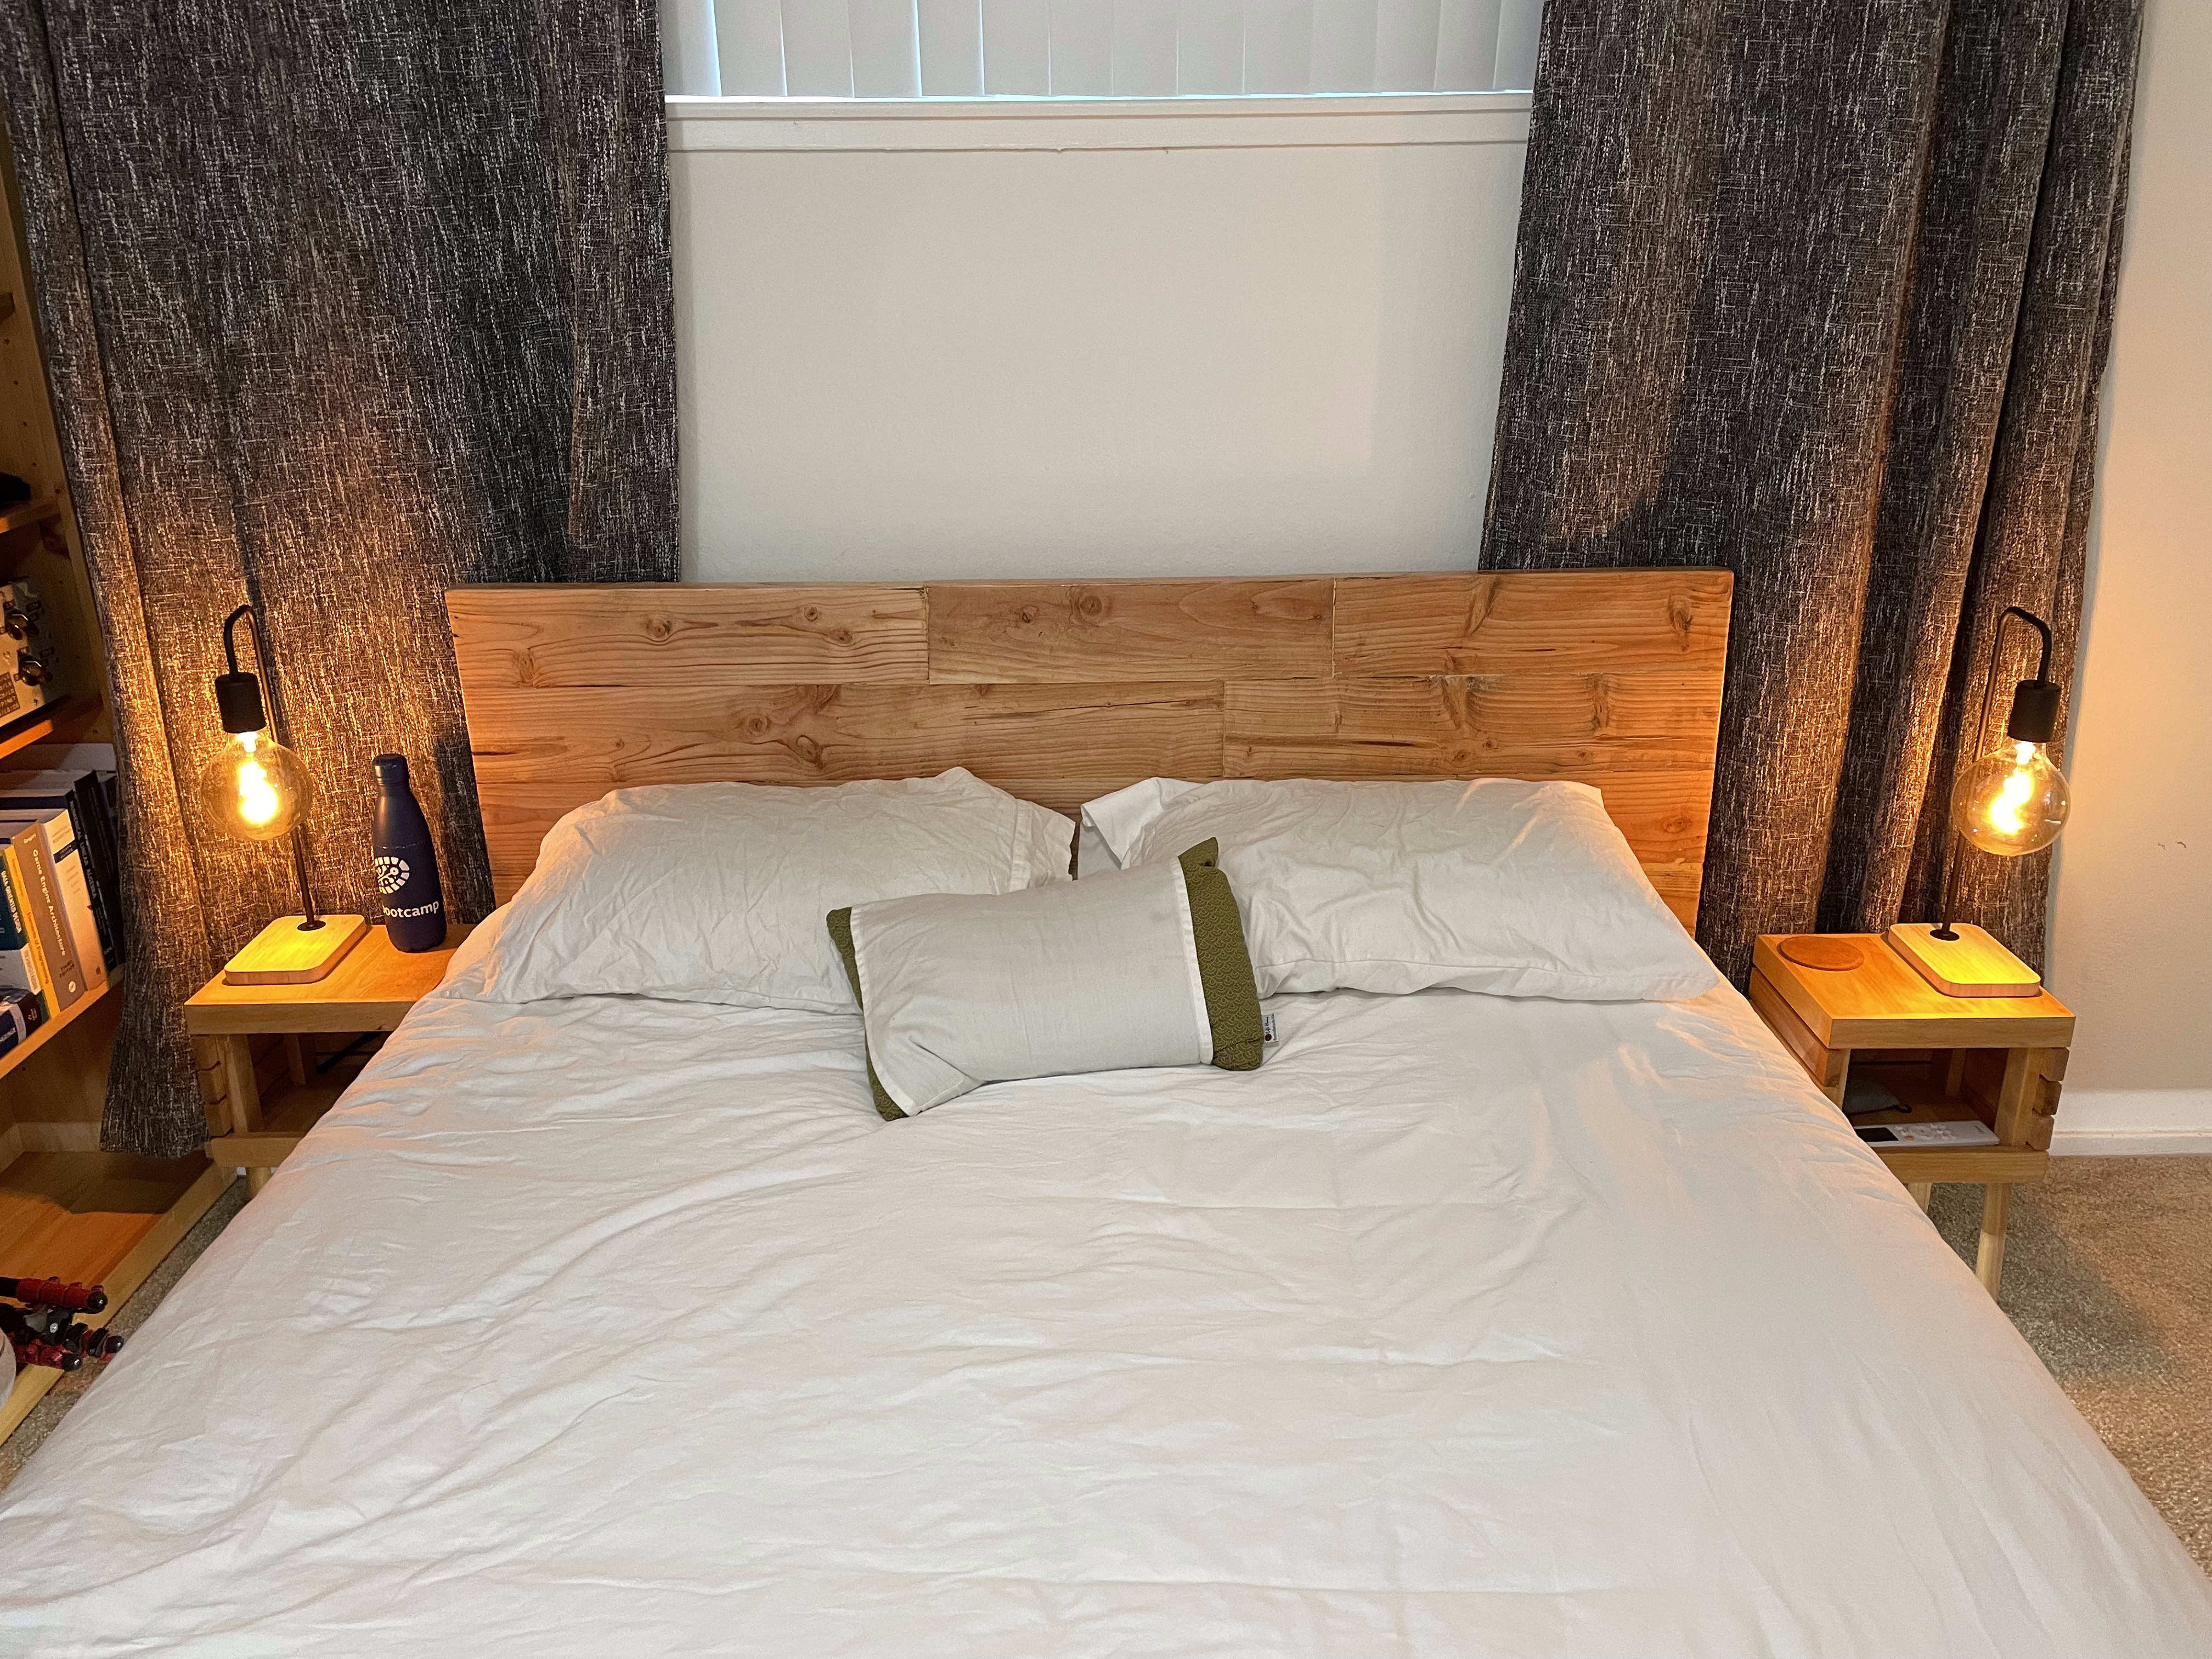
I’m actually quite proud of this outcome given all the mistakes I made along the way. This project really made it sink in how okay it really is to make mistakes in doing things. No one but I will spend the more than five seconds necessary to notice the flaws.