Photo Organization
May 21 2022
How I finally managed to get a handle on my photo catalog, on Linux.
About a month ago I finally finished getting my photo organization system together. This has been a many-years-long process, and I cannot describe how intense a relief it was to finally have something workable.
I have way too many photos I don’t know what to do with, being that I am the type of photographer to take a ton of shots and then dump them onto a hard drive to never see the light of day. It’s a meme with my friends at this point that I’ll take a year to get back with photos from a trip (and that really isn’t too far from the truth).
TL;DR Just use digiKam.
Context
My photo catalog is comprised of thousands of shots, spanning over a decade. Sources range from old phones to a modern mirrorless to scanned prints, and I started this project with probably close to a dozen different images formats.
Specific challenges in handling this catalog were as follows:
- I just switched my workstation to full-time Linux. I could no longer use Adobe software to organize my catalog, and had to find alternatives.
- Many photos from friends had lost their GPS tags. I believe at some point Google Photos must have stripped the tags.
- Live photos have poor support in non-Apple software. Live photos are actually a separate image and video, each with an EXIF tag referencing the other.
- My newest camera shoots Canon’s CR3 RAW format. Support is available, but requires installing from outside Ubuntu’s packaged versions.
My goals from this project were to be able to:
- quickly pull all photos from a trip or location,
- quickly pull all photos of myself or any friend,
- easily separate photos by photographer,
- and perform complex filters (e.g. query all shots by friend during trip).
File Management

The first step in this process was getting my old photo catalog into shape on disk. I set myself up with a NAS with automatic cloud backup, and moved my photo catalog to it. In order to reorganize the photos on disk, I used good old exiftool.
The follow script reorganizes all images into a YYYY/MM (e.g. 2019/05) folder structure, with each file named yymmdd_HHMMSS (e.g. 190501_060532).
This is great because it keeps all images sorted chronologically.
#!/usr/bin/env sh
exiftool -ee -r -d '%Y/%m/%y%m%d_%H%M%S%%+c.%%e' '-filename<$filemodifydate' '-filename<$createdate' '-filename<$datetimeoriginal' .
At this point I took the opportunity to find for any unusual photo formats and convert them to JPG.
Any live photos had their associated videos pulled out and put in my videos folder–which, unlike photos, is still a mess.
It won’t be too difficult to put together a quick script that can find the right live video based on the exif data in the photo, so there’s no concern with this separation.
Next, I loaded my catalog into digiKam. This is an awesome piece of open-source software for photo management that I wish I had known about way sooner. digiKam provides all of the filtering, tagging and other metadata manipulation that you need to get a catalog into shape. Perhaps the coolest feature is it’s face detection, which I’ll get to later.
I recommend setting digiKam to write out metadata straight to EXIF, with sidecar files. This makes the catalog resistant to file corruption or loss, and should make things connect smoothly to darktable for editing.
As a pre-processing step, digiKam includes a duplicate detector at Tools > Find Duplicates....
This is nice if you’ve sloppily copied around images (as I found I had done in the past).
Date & Time
With my whole catalog in digiKam it was time to solve the first big metadata issue: timestamps. A ton of my older DSLR shots had wrong timestamps due to a lack of timezone field. This meant travel photos needed to be offset by number of timezones to PDT.
To do this, I filtered for shots taken with the affected camera and selected all taken within the same timezone.
Using Item > Adjust Date & Time... you can bulk edit times by an offset.
A number of other photos had entirely wrong timestamps because their EXIF data had been stripped (e.g. from Messenger). I had to go through my whole catalog, top to bottom, looking for shots that were chronologically out of place and manually setting a best effort date & time.
Geolocation

Next up, geolocation.
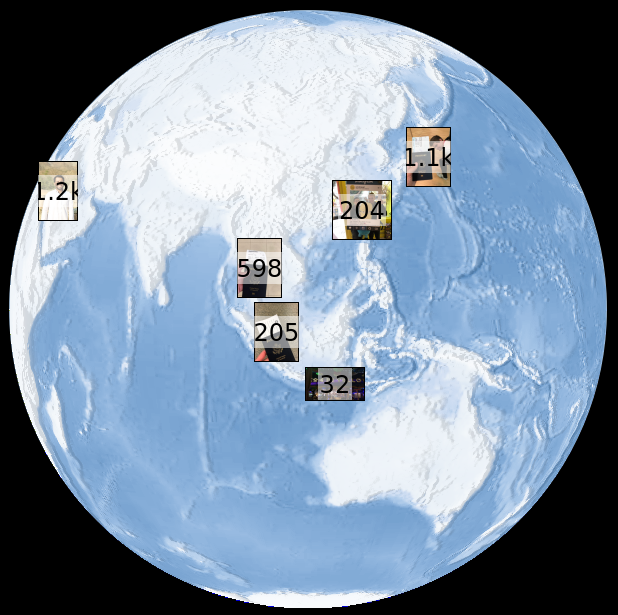
Being able to filter photos by location is awesome.
Sadly, the majority of my photos didn’t have GPS data.
To remedy this, I grouped photos chronologically based on when I was on certain trips, and used Item > Edit Geolocation... to place them in the roughly correct spot.
Filtering for which photos do not have a geotag makes this go relatively quickly.
Manual Location Tags
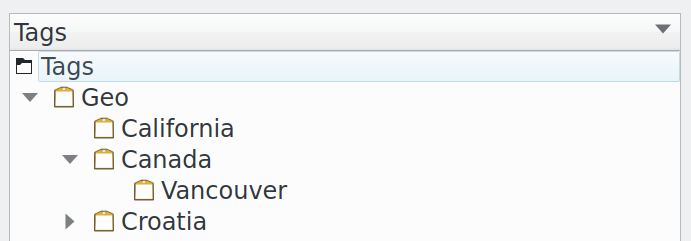
On top of the geotags, I also wanted manual hierarchical tags for locations. I use these tags to group photos based on the main location of a trip rather than actual geographical location. For example, Geo/Croatia/Split would include shots from Krka National Park. Hierarchical tags (versus flat) are nice because I don’t have to always query from a leaf in the tree, and photos do not have to live in a leaf node. Many photos from my NYC-to-Seattle road trip are just tagged by state and not city.

Face Detection

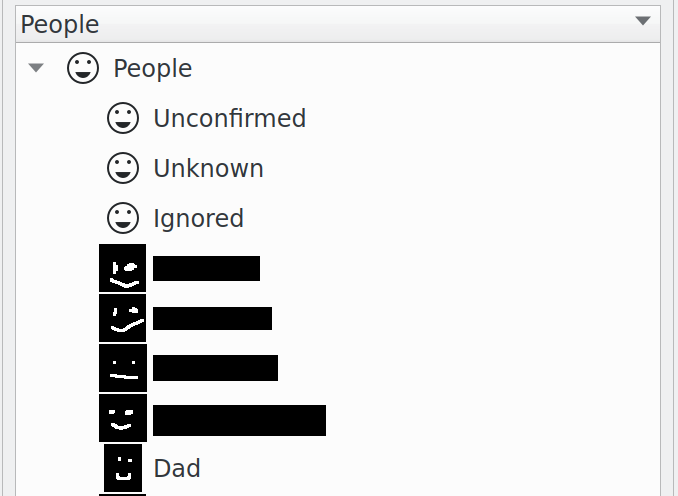
By far the coolest feature in digiKam is it’s face detector. Once set up, digiKam will generate a (massive) list of all faces found in your catalog. I went through the list adding tags for commonly appearing friends and family, and assigned a couple of faces to each. From here, digiKam will start suggesting faces for each tag, and you can give each a yes, a no or assign it another tag. Repeating this ad nauseum worked wonders for quickly tagging the bulk of my photos’ faces.
Copyright
Many of the phone photos in my library are missing copyright information, and likewise not every shot taken on a specific device was by the owner.
As such, I can’t filter out photos I didn’t take, which would be nice for when (if) I ever start putting photos online.
Item > Edit Metadata... let’s you modify metadata such as the copyright of an image to enable this.
However, as it is another “go through the whole catalog” type task, I’m opting to wait until it’s needed.